Archives (page 8 of 20)

bahamas cruising guide

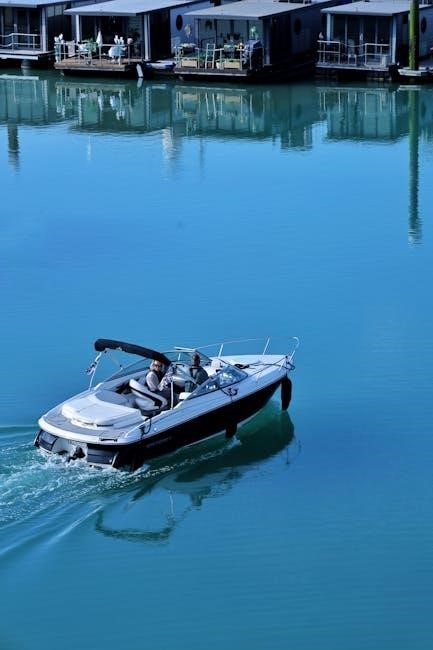
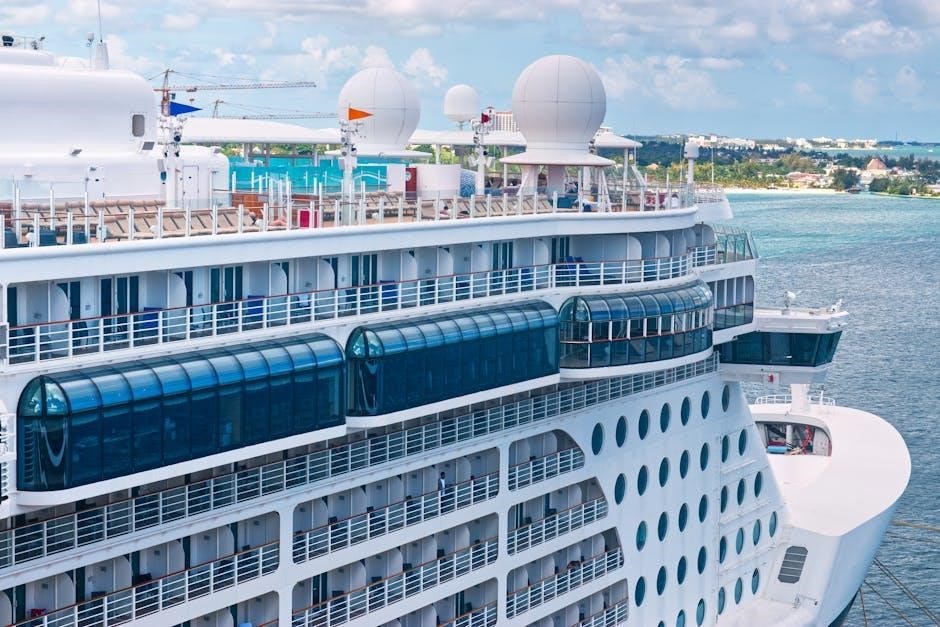
The Bahamas offers crystal-clear waters‚ vibrant coral reefs‚ and a rich cultural heritage‚ making it a premier destination for sailors and cruisers worldwide. With its stunning landscapes‚ diverse marine life‚ and warm hospitality‚ the Bahamas provides endless opportunities for exploration and relaxation. From serene anchorages to bustling ports‚ this archipelago is a must-visit for any cruising enthusiast.

Its strategic location in the Caribbean‚ combined with its well-developed marinas and welcoming atmosphere‚ ensures a memorable experience for all. Whether you’re seeking adventure‚ tranquility‚ or cultural immersion‚ the Bahamas delivers unparalleled cruising experiences.

1.1 Overview of the Bahamas Archipelago

The Bahamas archipelago spans over 3‚000 cays‚ islands‚ and islets‚ offering a diverse cruising landscape. Located southeast of Florida‚ it stretches across the Atlantic and Caribbean‚ providing a strategic gateway for sailors. The archipelago is renowned for its turquoise waters‚ vibrant coral reefs‚ and white sandy beaches‚ creating a paradise for explorers and cruisers alike.

From the bustling ports of Nassau to the serene anchorages of the Out Islands‚ the Bahamas offers a unique blend of culture‚ nature‚ and adventure. Its well-developed marinas‚ safe harbors‚ and welcoming atmosphere make it a top destination for cruisers seeking unforgettable experiences in the Caribbean.

1.2 Why the Bahamas is a Popular Cruising Spot

The Bahamas’ crystal-clear waters‚ vibrant coral reefs‚ and stunning landscapes attract cruisers worldwide. Its strategic location near Florida and well-developed marinas make it easily accessible. The archipelago offers a mix of serene anchorages‚ bustling ports‚ and rich cultural experiences‚ catering to both relaxation and adventure. These factors combined create a perfect destination for cruisers seeking unforgettable experiences.

Additionally‚ the Bahamas’ warm climate‚ diverse marine life‚ and welcoming locals enhance its appeal. With countless opportunities for snorkeling‚ diving‚ and exploring‚ it remains a top choice for sailors and travelers alike‚ ensuring a memorable cruising experience.

1.3 Brief History of Cruising in the Bahamas

The Bahamas’ cruising history dates back to the Lucayan Indians and early explorers like Columbus. Its strategic location made it a maritime crossroads for trade and piracy. By the 20th century‚ it became a popular destination for American cruisers‚ drawn by its pristine waters and vibrant culture.

Today‚ the Bahamas is a cruising hub‚ blending rich history with modern amenities. Its transformation into a premier destination reflects its adaptability and enduring appeal to sailors and travelers worldwide.

Planning Your Bahamas Cruising Trip

Planning a Bahamas cruise involves timing your trip seasonally‚ budgeting for expenses‚ securing necessary documents‚ and researching reliable itineraries to ensure a smooth and enjoyable journey.

Utilize cruising guides and charts to prepare for the adventure ahead‚ ensuring a well-organized trip tailored to your preferences and needs.

2.1 Best Time to Cruise the Bahamas

The best time to cruise the Bahamas is during the dry season‚ from December to May‚ offering pleasant weather‚ calm seas‚ and ideal conditions for sailing and snorkeling.

Summer months bring warmer temperatures but also hurricane risks‚ while the shoulder season (November and June) provides fewer crowds and lower costs‚ making it a great time for budget-conscious travelers.

2.2 Choosing the Right Itinerary

Choosing the right itinerary for your Bahamas cruise depends on your interests‚ duration‚ and experience level. Popular routes include exploring the Out Islands‚ visiting historic Nassau‚ or sailing through the Exumas. Consider the season‚ weather conditions‚ and marina availability when planning. A well-planned itinerary ensures a balanced mix of relaxation‚ adventure‚ and cultural experiences‚ tailored to your preferences.

Whether you prefer secluded beaches‚ vibrant ports‚ or snorkeling in crystal-clear waters‚ a thoughtfully designed route will maximize your cruising enjoyment and create lasting memories of the Bahamas.

2.3 Essential Documents and Requirements

Ensure you have a valid passport‚ cruising permit‚ and boat registration before entering the Bahamas. All pleasure vessels must be registered and cleared through customs. A cruising permit is mandatory for all foreign-flagged boats. Additionally‚ carry proof of insurance and be prepared to declare all onboard items to avoid delays during the clearance process.

Understanding and complying with these requirements ensures a smooth entry and hassle-free cruising experience in the Bahamas.

2;4 Budgeting for Your Bahamas Cruise

Budgeting is crucial for a stress-free Bahamas cruise. Plan for marina fees‚ fuel‚ provisions‚ and customs charges. Average marina costs range from $2 to $5 per foot nightly‚ while fuel prices vary based on location. Allocate funds for dining‚ activities‚ and incidentals; Set aside $500–$1‚000 per week for a modest cruising budget‚ adjusting based on your itinerary and preferences.

Consider provisioning costs and potential unexpected expenses to ensure a enjoyable trip without overspending.

Arrival and Customs in the Bahamas

Upon arrival‚ cruisers must use the Click2Clear system and complete the Cruising Permit Module for a smooth customs process. This ensures compliance with entry requirements and documentation.

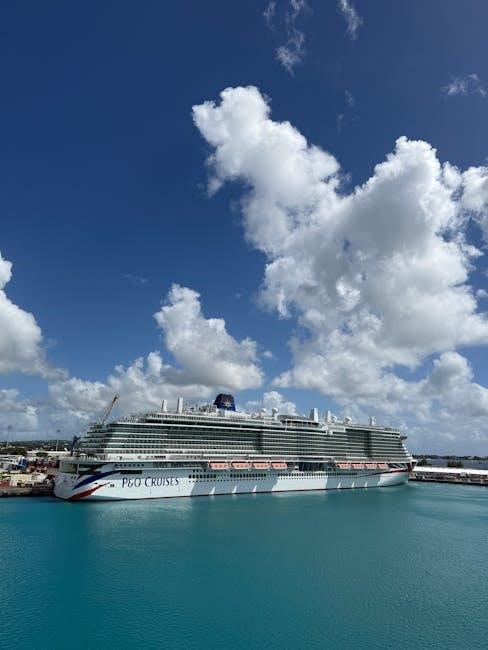
3.1 Ports of Entry and Clearance Process

The Bahamas has multiple designated ports of entry‚ including Nassau‚ Freeport‚ and Marsh Harbour‚ where cruisers must officially clear customs. The process involves declaring all onboard items and obtaining a cruising permit through the Click2Clear system. Proper documentation and adherence to regulations ensure a hassle-free entry into Bahamian waters for all voyagers.

3.2 Understanding Customs and Immigration Rules

When entering the Bahamas‚ cruisers must comply with customs and immigration rules. All onboard items‚ including food‚ alcohol‚ and firearms‚ must be declared. Prohibited items include certain plant and animal products. Foreign-flagged vessels must adhere to the Passenger Vessel Services Act (PVSA) when traveling between U.S. ports‚ ensuring legal compliance during their stay.

3.4 What to Declare and Prohibited Items

Cruisers must declare all onboard items‚ including food‚ alcohol‚ and firearms. Prohibited items include certain plant and animal products‚ illegal drugs‚ and weapons. Failure to declare goods or attempting to bring prohibited items can result in fines or confiscation. Ensure compliance with customs regulations to avoid delays or penalties during your Bahamas cruise.

Navigating Bahamian Waters

Navigating the Bahamas requires detailed charts and GPS‚ as the crystal-clear waters hide coral reefs and shifting sands. Plan carefully to ensure safe passage through this stunning archipelago.

4.1 Charts and Maps for Safe Navigation

Navigating the Bahamas requires detailed charts and maps to avoid coral reefs and shallow waters. Use reliable charts like Navionics or C-Map‚ updated regularly. Carry physical charts as backups and ensure your GPS is accurate. The waters can be unpredictable‚ so thorough preparation is essential for safe and enjoyable cruising in the Bahamas.

4.2 Understanding Tides‚ Currents‚ and Weather

The Bahamas’ subtropical climate offers warm temperatures and high humidity year-round. Tides and currents significantly affect navigation‚ especially in shallow waters. The hurricane season‚ from June to November‚ requires careful planning to mitigate risks. Regular monitoring of weather forecasts‚ using reliable sources like NOAA‚ is essential for safe and enjoyable cruising through the islands.

4.3 Communication Tools for Cruisers

Reliable communication is vital while cruising the Bahamas. Popular tools include VHF radios for real-time updates and GPS devices for precise navigation. Apps like WhatsApp and Facebook Messenger are widely used for staying in touch with fellow cruisers. Additionally‚ many marinas offer complimentary Wi-Fi‚ ensuring connectivity during your stay.

Local SIM cards or prepaid plans provide affordable data access‚ while satellite phones are recommended for remote areas with limited coverage‚ ensuring safety and connectivity throughout your journey.

Provisions and Fuel

Stocking up on provisions and fuel is essential for a smooth Bahamas cruise. Popular spots like Nassau and Freeport offer ample supplies‚ while smaller islands provide basics. Plan ahead for fuel efficiency‚ as availability can vary. Ensure water and food storage are optimized for longer voyages between ports.

Local markets and marinas are great for fresh produce and seafood‚ enhancing your cruising experience with authentic Bahamian flavors and essentials.

5.1 Best Places to Restock Supplies

Nassau and Freeport are top spots for restocking‚ offering well-stocked markets and marinas. Smaller islands provide basics‚ but larger ports ensure variety and quality. Plan visits to these hubs to replenish groceries‚ fresh produce‚ and essentials‚ ensuring a smooth continuation of your Bahamas cruise. Don’t miss the chance to enjoy fresh seafood and local flavors during your stops.

5.2 Managing Water and Fuel Consumption

Monitor water and fuel usage closely‚ as resources can be limited in remote Bahamian islands. Plan refills at major ports like Nassau or Freeport; Conserve water by using solar showers and minimizing generator use. Carry extra fuel and water reserves‚ especially for extended trips. Efficient management ensures a smooth and enjoyable cruising experience throughout the Bahamas.

5.3 Local Cuisine and Dining Options

The Bahamas offers a flavorful blend of fresh seafood‚ tropical fruits‚ and traditional dishes like conch fritters‚ guava duff‚ and peas and rice. Dine at local eateries or upscale restaurants‚ each showcasing Bahamian cuisine. Provision your boat with fresh produce from markets or enjoy dockside dining‚ savoring the island’s culinary delights while immersing in its vibrant culture.

Anchoring and Mooring

The Bahamas offers numerous safe anchorages with clear waters and vibrant marine life. Proper anchoring techniques and respect for the environment ensure a sustainable cruising experience.

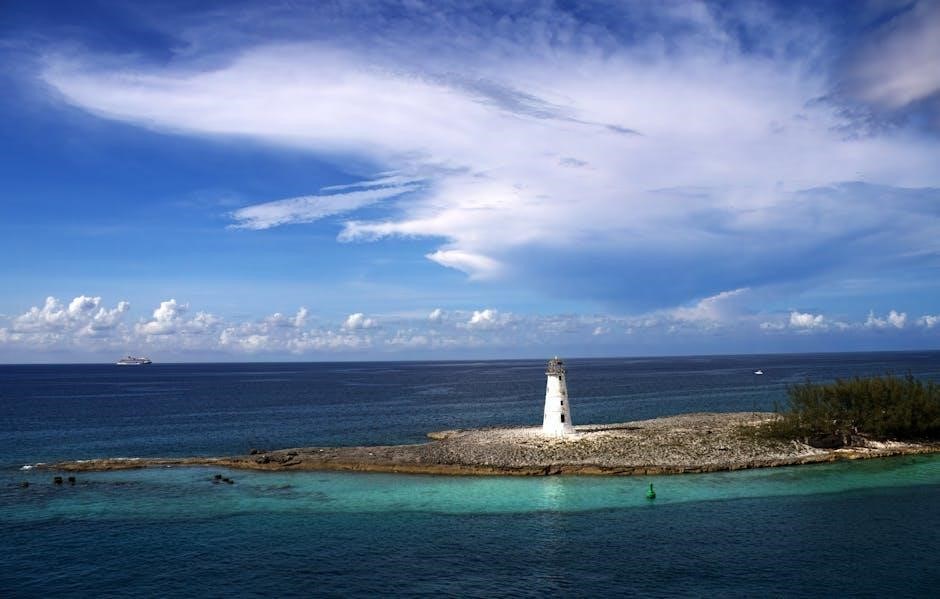
6.1 Popular Anchorages in the Bahamas

The Bahamas boasts numerous exceptional anchorages‚ such as Nassau Harbour‚ Paradise Island‚ and the Exumas. These spots offer serene environments‚ crystal-clear waters‚ and access to stunning beaches. Popular anchorages like Eleuthera and Long Island provide opportunities to explore vibrant marine life and enjoy secluded coves. Each location offers unique charm‚ catering to different preferences and vessel needs.

6.2 How to Anchor Safely in Different Conditions

Ensure safe anchoring by assessing weather‚ sea floor‚ and surrounding obstacles. Avoid coral reefs to prevent damage. Use appropriate anchor types for sand‚ grass‚ or rocky bottoms. Monitor wind and current shifts‚ adjusting your position as needed. Maintain a safe distance from other vessels and marine life. Always test the anchor’s hold before leaving it unattended.

6.3 Environmental Considerations for Anchoring

Protect the Bahamas’ fragile marine ecosystem by avoiding coral reefs and seagrass beds. Use anchors with non-toxic paint to prevent chemical contamination. Dispose of waste properly‚ taking all trash ashore. Avoid disturbing marine life‚ such as sea turtles and fish. Follow local regulations to preserve the environment and ensure sustainable cruising practices for future generations.

Marinas and Boatyards

The Bahamas’ top-rated marinas offer excellent facilities‚ including fuel docks and luxurious amenities. Local boatyards provide essential repair services‚ ensuring your vessel remains seaworthy during your cruise.

7.1 Top-Rated Marinas in the Bahamas

The Bahamas boasts world-class marinas like Atlantis Marina in Nassau and Nassau Yacht Haven‚ offering state-of-the-art facilities‚ fuel docks‚ and luxurious amenities. These marinas cater to both superyachts and smaller vessels‚ providing secure berthing‚ maintenance services‚ and access to nearby attractions. Their excellent service and strategic locations make them top choices for cruisers exploring the islands.

7.2 Services Offered by Local Boatyards

Local boatyards in the Bahamas provide a wide range of services‚ including hull maintenance‚ mechanical repairs‚ and fiberglass work. Many offer painting‚ welding‚ and electrical system upgrades‚ ensuring your vessel is seaworthy. With skilled technicians and modern facilities‚ these boatyards cater to various cruising needs‚ from routine checks to extensive overhauls‚ keeping you safe and ready for the next adventure.

7.3 Tips for Booking Marina Spaces

Booking marina spaces in the Bahamas requires planning ahead‚ especially during peak seasons. Use online platforms or contact marinas directly to reserve slips. Flexibility in dates and considering off-peak times can secure better rates. Always confirm amenities like water‚ electricity‚ and fuel availability to ensure they meet your needs.

Check reviews and ask for recommendations to find reliable and well-maintained marinas‚ ensuring a smooth and enjoyable stay.

Safety and Emergency Procedures

Understanding hurricane risks‚ accessing medical care‚ and knowing emergency protocols are crucial for safe cruising in the Bahamas. Ensure you carry reliable communication devices and stay informed about weather conditions to navigate safely and respond effectively in case of emergencies.

8.1 Understanding Hurricane Risks and Safety

The Bahamas is susceptible to hurricanes‚ typically occurring between June and November. Cruisers must monitor weather forecasts‚ have emergency plans‚ and secure safe harbors. Understanding hurricane categories and evacuation procedures is vital. Always carry reliable communication devices and stay informed through trusted weather services to ensure safety during your voyage.

8.2 Medical Care and Emergency Services

Medical facilities in the Bahamas vary‚ with better-equipped hospitals in Nassau and Freeport. Cruisers should carry comprehensive medical kits and insurance. In emergencies‚ contact the Emergency Medical Services hotline or nearby marinas for assistance. Telemedicine services are also available for remote consultations. Always have a plan for medical evacuations‚ especially when cruising remote areas.

8.3 What to Do in Case of a Boating Emergency

In a boating emergency‚ remain calm and activate your EPIRB or send a Mayday call. Ensure all passengers wear life jackets and secure loose items. Assess damage and contain water ingress if possible. Use flares or reflective devices to stay visible. Ration supplies and prepare for evacuation if necessary. Keep communication devices accessible and follow Coast Guard instructions.

Legal and Environmental Regulations

Adhering to local laws and environmental guidelines is crucial to preserve the Bahamas’ marine ecosystem. Familiarize yourself with fishing permits‚ waste disposal‚ and coral reef protections to ensure sustainable cruising practices.

9.1 Fishing and Boating Regulations

Understanding local fishing and boating regulations is essential to preserve the Bahamas’ marine ecosystem. Obtain permits for fishing‚ avoid spearfishing in protected areas‚ and refrain from touching coral reefs. Adhere to size and catch limits for seafood‚ and use environmentally safe fishing gear to minimize ecological impact. Non-compliance may result in penalties‚ so ensure you follow all guidelines carefully.

9.2 Protecting Marine Life and Coral Reefs

  • Avoid touching or standing on coral reefs to prevent damage and promote their survival.
  • Dispose of waste properly to prevent pollution and protect marine ecosystems.
  • Refrain from feeding wildlife‚ as this disrupts their natural behavior and habitat balance.
  • Respect protected marine areas and wildlife reserves to conserve biodiversity.

9.3 Waste Disposal and Environmental Best Practices

Proper waste disposal is crucial to preserve the Bahamas’ pristine environment. Use recycling programs available in major ports and dispose of trash at designated facilities. Avoid discharging hazardous waste‚ including oil and chemicals‚ into the water. Keep trash securely stored to prevent it from blowing overboard. Penalties may apply for non-compliance with environmental regulations.

Cultural and Social Experiences

The Bahamas offers a vibrant culture rich in traditions‚ music‚ and cuisine. Engage with locals‚ attend festivals‚ and explore historical sites to immerse yourself in the island lifestyle.

10.1 Engaging with Local Bahamian Culture

Engaging with Bahamian culture offers a rich experience through festivals‚ local cuisine‚ and community interactions. Attend vibrant Junkanoo parades‚ savor dishes like conch fritters‚ and participate in traditional music and dance. Visit historical sites to learn about the islands’ heritage. Interacting with locals provides a deeper connection to the Bahamas’ warm and welcoming society‚ enhancing your cruising adventure.

shiva ashtottara shatanamavali in telugu pdf

Shiva Ashtottara Shatanamavali is a revered devotional prayer featuring 108 sacred names of Lord Shiva, symbolizing his divine attributes and cosmic significance. Available as a Telugu PDF, it facilitates easy access for devotees seeking spiritual enrichment and worship.

What is Shiva Ashtottara Shatanamavali?

Shiva Ashtottara Shatanamavali is a sacred Hindu devotional prayer that consists of 108 names of Lord Shiva, each highlighting his divine attributes and cosmic significance. This prayer is a powerful tool for worship, offering devotees a profound way to connect with Lord Shiva and seek his blessings. The names in the Shatanamavali are deeply symbolic, reflecting Shiva’s role as the destroyer, transformer, and protector. It is often chanted in temples and during home pujas to invoke divine grace and spiritual growth. The availability of the Shiva Ashtottara Shatanamavali in Telugu PDF format makes it easily accessible for devotees to recite and practice daily, enhancing their spiritual journey.

Significance of 108 Names of Lord Shiva

The 108 names of Lord Shiva in the Ashtottara Shatanamavali hold profound spiritual and symbolic significance. Each name represents a distinct attribute or form of Shiva, reflecting his universal role as the destroyer of evil, transformer of souls, and bestower of liberation. The number 108 is considered sacred in Hinduism, symbolizing completeness and the infinite nature of the divine. Chanting these names is believed to bring spiritual purification, protection, and blessings. The Telugu PDF version allows devotees to conveniently recite these names, making it an essential tool for daily worship and meditation, fostering a deeper connection with Lord Shiva and his divine essence.

Structure and Composition of the Ashtottara Shatanamavali

The Shiva Ashtottara Shatanamavali is a structured composition of 108 names, each describing Lord Shiva’s divine attributes and cosmic roles. The Telugu PDF version presents these names in simple, clear Telugu script, allowing devotees to recite them easily during daily worship. The composition is divided into sections, facilitating organized and meaningful chanting.

The 108 Names of Lord Shiva Explained

The 108 names of Lord Shiva, as detailed in the Shiva Ashtottara Shatanamavali, are profound expressions of his divine attributes and cosmic roles. Each name carries deep spiritual significance, reflecting Shiva’s various forms and aspects. For instance, names like “Shiva” denote his benevolent nature, while “Maheshwara” signifies his role as the supreme ruler. These names are not merely titles but encapsulate the essence of his divine powers and the reverence he commands. The Telugu PDF version ensures that devotees can access and recite these names with clarity, fostering a deeper connection to the divine. The structure of the names is organized to facilitate smooth chanting during worship and meditation, enhancing the spiritual experience of those who recite them. The 108 names collectively provide a comprehensive understanding of Lord Shiva’s multifaceted personality and his role in the universe, making the Shatanamavali a cherished devotional text.

Language and Script: Telugu PDF Version

The Shiva Ashtottara Shatanamavali is widely available in a Telugu PDF format, making it accessible to Telugu-speaking devotees. This version meticulously preserves the original Sanskrit text alongside its Telugu transliteration, ensuring linguistic accuracy and cultural relevance. The PDF format allows for easy downloading and printing, enabling devotees to carry the sacred text for daily worship or special rituals. The clarity of the Telugu script and the structured layout enhance readability, making it user-friendly for both seasoned practitioners and newcomers. This digital accessibility ensures that the spiritual significance of the 108 names reaches a broader audience, fostering devotion and connection to Lord Shiva across generations and geographies.

Benefits of Chanting Shiva Ashtottara Shatanamavali

Chanting Shiva Ashtottara Shatanamavali brings spiritual growth, divine blessings, and inner peace. It helps seek forgiveness, ward off negativity, and attain Lord Shiva’s grace for prosperity and harmony in life.

Spiritual and Devotional Significance

The Shiva Ashtottara Shatanamavali holds profound spiritual and devotional significance, offering a deep connection to Lord Shiva through his 108 divine names. Each name embodies his cosmic attributes, fostering devotion and reverence. Devotees chant this prayer to seek blessings, forgiveness, and spiritual enlightenment. The recitation is believed to purify the soul, mitigate karma, and grant inner peace. In Hindu tradition, it is often chanted during pujas, festivals, and personal worship, creating a sacred bond between the devotee and the divine. The Telugu PDF version makes it accessible for regional devotees, ensuring the ancient hymn’s legacy endures. By chanting these names, one experiences emotional solace, spiritual upliftment, and a deeper understanding of Shiva’s universal presence.

How Chanting Impacts Daily Life and Worship

Chanting the Shiva Ashtottara Shatanamavali profoundly influences daily life and worship, fostering a sense of balance and harmony. Regular recitation is believed to bring mental clarity, emotional stability, and spiritual growth. It helps devotees cultivate resilience against life’s challenges, promoting a positive outlook and calm demeanor. In worship, chanting this hymn enhances the depth of prayer, creating a sacred atmosphere and strengthening one’s connection with Lord Shiva. Many find that incorporating it into daily rituals improves focus during meditation and instills a sense of divine presence. The availability of the Telugu PDF version ensures that devotees can easily integrate this practice into their daily routines, enriching their spiritual journey and fostering a deeper sense of devotion and inner peace.

Downloading the Shiva Ashtottara Shatanamavali in Telugu PDF

The Shiva Ashtottara Shatanamavali Telugu PDF is easily downloadable from platforms like Vaidika Vignanam and Telugu Rush, ensuring convenient access for daily prayers and chants.

Popular Platforms for Download

Devotees can easily download the Shiva Ashtottara Shatanamavali in Telugu PDF from trusted platforms like Vaidika Vignanam, Telugu Rush, and Stotranidhi. These websites offer free access to the sacred text, ensuring convenience for spiritual seekers; Additionally, platforms like Bhakthi TV and Sanskritcheerful provide downloadable versions, often accompanied by lyrics and chanting guides. Some platforms also offer the PDF in multiple languages, including English, for broader accessibility. These resources are widely recognized for their authenticity and user-friendly interfaces, making it simple for anyone to obtain the Shiva Ashtottara Shatanamavali Telugu PDF for personal or communal worship.

Steps to Download and Use the PDF

To download the Shiva Ashtottara Shatanamavali in Telugu PDF, visit trusted platforms like Vaidika Vignanam or Telugu Rush; Search for “Shiva Ashtottara Shatanamavali Telugu PDF” on the website. Click the download link provided, and save the file to your device. Once downloaded, open the PDF to access the 108 names of Lord Shiva in Telugu script. For worship, recite the names with devotion, either aloud or silently, ideally in front of a Shiva Linga or during puja. You can also print the PDF for convenience during prayers or share it with fellow devotees. Ensure proper respect and focus while chanting to derive maximum spiritual benefits.

Cultural and Religious Importance

Shiva Ashtottara Shatanamavali holds profound cultural and religious significance in Hinduism, embodying devotion to Lord Shiva. It is widely used in temples and home pujas to connect spiritually with Shiva.

Role in Hindu Worship and Rituals

The Shiva Ashtottara Shatanamavali plays a vital role in Hindu worship, often recited during pujas, festivals, and daily devotion. It is chanted in temples and homes to invoke Lord Shiva’s blessings, ensuring spiritual harmony. Devotees believe that reciting these 108 names helps appease Shiva, granting peace and prosperity. During Maha Shivaratri, it is particularly significant, as chanting the names is considered a sacred ritual. The prayer is also used in ceremonies like weddings and new beginnings, symbolizing divine protection. Many devotees recite it 108 times for amplified spiritual benefits. Additionally, it is believed to mitigate planetary influences and resolve life challenges. The Telugu PDF version makes it accessible for devotees to perform rituals with accuracy and devotion, strengthening their connection to Lord Shiva.

Usage in Temples and Home Pujas

The Shiva Ashtottara Shatanamavali is widely used in temples and home pujas to invoke Lord Shiva’s blessings. In temples, it is often chanted collectively during worship, creating a divine atmosphere. Devotees recite it in front of the Shiva Linga, believing it amplifies spiritual connection. At home, families incorporate it into daily puja routines or special occasions, seeking peace and prosperity. The Telugu PDF version is particularly handy, allowing easy access for recitation. Many devotees also use it during Maha Shivaratri celebrations, further enhancing its sacred significance. The prayer’s portability and readability in Telugu make it a popular choice for both collective and personal worship, fostering a deeper bond with Lord Shiva in diverse spiritual settings.

Transliteration and Accuracy

Transliteration ensures accurate pronunciation and meaning, preserving the sanctity of the 108 names for spiritual significance. Proper rendering from Sanskrit to Telugu maintains the essence and divine connection.

Ensuring Correct Pronunciation and Meaning

Accurate pronunciation and meaning are vital when reciting the Shiva Ashtottara Shatanamavali. The Telugu PDF ensures linguistic fidelity, preserving the spiritual essence of each name. Proofreaders like Varun Mandawara have meticulously verified the transliteration, maintaining the sanctity of the original Sanskrit text. Devotees can rely on the PDF for precise rendering, enabling them to connect deeply with Lord Shiva’s attributes. Correct recitation enhances the devotional experience, fostering a stronger spiritual bond. For those unfamiliar with Sanskrit, the Telugu version serves as a bridge, simplifying access while retaining the divine significance. Regular practice and guidance from experienced chanters further refine the recitation, ensuring the names are chanted with reverence and accuracy.

Comparative Analysis with Sanskrit Version

The Shiva Ashtottara Shatanamavali in Telugu PDF is a faithful transliteration of the original Sanskrit text, preserving its spiritual and linguistic essence. While the Sanskrit version is revered for its Vedic authenticity, the Telugu rendition ensures accessibility for regional devotees. Both versions maintain the sequence and meaning of the 108 names, though minor phonetic adjustments are made to align with Telugu pronunciation. The PDF format bridges the gap between the ancient script and modern accessibility, allowing devotees to chant with accuracy. This transliteration is meticulously proofread, ensuring that the divine attributes of Lord Shiva remain intact. Thus, the Telugu PDF serves as a reliable companion for those who seek to connect with the sacred hymn in their native language while honoring its original sanctity.

The Shiva Ashtottara Shatanamavali is a sacred prayer with 108 divine names of Lord Shiva, now accessible in Telugu PDF, offering spiritual growth and devotional bliss to all devotees.

Final Thoughts on the Shiva Ashtottara Shatanamavali

The Shiva Ashtottara Shatanamavali is a profound devotional tool, offering a deep connection to Lord Shiva through his 108 sacred names. Its availability in Telugu PDF has made it accessible to a wider audience, enabling devotees to chant and reflect on his divine attributes with ease. This sacred text not only strengthens spiritual practices but also serves as a reminder of Lord Shiva’s universal significance. By incorporating this Namavali into daily worship, believers can experience emotional solace, spiritual growth, and a heightened sense of devotion. Its versatility in both temple rituals and home pujas underscores its enduring importance in Hindu spirituality, making it a timeless guide for seekers of divine grace and enlightenment.

gentle and lowly study guide pdf

This study guide explores Dane Ortlund’s Gentle and Lowly‚ offering a deeper dive into Christ’s heart for sinners and sufferers. It provides reflection questions‚ practical applications‚ and a structured approach to understanding Jesus’ gentleness‚ humility‚ and kindness‚ equipping readers to apply these truths in daily life.

Overview of the Study Guide

The Gentle and Lowly Study Guide is a comprehensive resource designed to accompany Dane Ortlund’s book‚ offering a structured approach to exploring Christ’s heart. It includes reflection questions‚ practical applications‚ and biblical insights to deepen understanding. Available in PDF format‚ the guide is ideal for individual or group study. Created by various authors‚ such as Bonnie Vacher and Rev. Dr. Jason Carter‚ it spans multiple pages‚ providing a detailed chapter-by-chapter analysis. The guide emphasizes Jesus’ gentleness‚ humility‚ and kindness‚ with a focus on how these attributes impact believers. It also includes discussion prompts for small groups and personal reflection‚ making it a valuable tool for spiritual growth and application. The study guide is widely available online for easy access.

Author Background: Dane Ortlund

Dane Ortlund is the author of Gentle and Lowly: The Heart of Christ for Sinners and Sufferers. He is the son of Anne and Ray Ortlund Sr. and the brother of Ray Ortlund. Dane’s work is deeply rooted in biblical theology‚ and his writing reflects a profound understanding of Christ’s nature. His book has resonated with many‚ offering a fresh perspective on Jesus’ gentleness and humility. Ortlund’s background in theology and his passion for making complex truths accessible have made his study guide a valuable resource for believers seeking to deepen their faith. His work emphasizes the practical application of Christ’s kindness and grace in everyday life‚ making it a cherished tool for spiritual growth.

Purpose of the Study Guide

The purpose of the Gentle and Lowly study guide is to deepen readers’ understanding of Christ’s heart as revealed in Scripture. It serves as a companion to Dane Ortlund’s book‚ offering structured reflection questions‚ practical applications‚ and biblical insights. The guide aims to help individuals and small groups explore the themes of Jesus’ gentleness‚ humility‚ and kindness. By providing a framework for discussion and personal reflection‚ it encourages believers to apply these truths to their lives‚ fostering spiritual growth and a deeper relationship with Christ. The study guide is designed to be accessible‚ making it a valuable tool for both individual and group study settings.

Key Themes of Gentle and Lowly

The study guide emphasizes Christ’s heart for sinners‚ His gentleness and humility‚ and the transforming power of His kindness‚ offering a profound exploration of Jesus’ character.

The Heart of Christ for Sinners and Sufferers

Dane Ortlund’s study guide reveals Jesus’ gentle and lowly heart‚ emphasizing His deep compassion for sinners and sufferers. It highlights how Christ’s kindness and humility bring comfort and restoration to those burdened by sin and pain‚ offering a profound understanding of His love and grace. Through biblical insights and reflection questions‚ the guide helps readers grasp the depth of Christ’s heart‚ encouraging them to find rest and hope in His promises. This theme is central to the study‚ providing a powerful reminder of Jesus’ endless kindness and His desire to lift the heavy-laden.

Understanding Jesus’ Gentleness and Humility

Jesus’ gentleness and humility are central to His character‚ as revealed in the study guide. His gentleness is not weakness but a profound strength‚ demonstrated in His compassion toward sinners and sufferers. Humility is His willingness to serve and stoop low‚ even to the point of sacrificing His life. The guide explores how these traits are not just attributes but the essence of His heart‚ offering comfort and hope to those who feel unworthy. Through biblical insights and reflection questions‚ readers gain a deeper understanding of how Jesus’ gentleness and humility transform lives‚ inviting believers to imitate His example in their own relationships and daily living.

The Importance of Christ’s Kindness

Christ’s kindness is a cornerstone of His character‚ revealed throughout Scripture as a profound expression of His love for sinners and sufferers. The study guide emphasizes how His kindness is not merely an act but an enduring trait that transforms lives. By examining biblical passages‚ the guide illustrates how Christ’s kindness leads to spiritual rest and renewal. It encourages believers to reflect on how His kindness sustains them in trials and inspires them to extend the same grace to others. This section highlights the transformative power of Christ’s kindness‚ inviting readers to deepen their faith and embody His compassion in daily life‚ fostering a heart of humility and gentleness.

Chapter-by-Chapter Analysis

This section provides an in-depth look at each chapter of Gentle and Lowly‚ highlighting key themes‚ biblical insights‚ and practical applications to deepen your understanding of Christ’s heart.

Chapter 1 sets the foundation by introducing the central verse of the study: “I am gentle and lowly in heart” (Matthew 11:29). Dane Ortlund emphasizes that this single description of Jesus’ heart is pivotal for understanding His character. The chapter explores how Christ’s gentleness and humility are not just traits but the essence of His being. It invites readers to reflect on how this truth transforms their view of God and themselves. The study guide complements this chapter with reflection questions‚ encouraging personal application and a deeper connection with Christ’s heart. This introduction lays the groundwork for the rest of the book‚ highlighting the significance of Christ’s gentle and lowly nature in relating to sinners and sufferers.

Chapter 2: The Nature of Gentleness

Chapter 2 delves into the essence of gentleness‚ often misunderstood as weakness‚ but revealed as divine strength in Christ. Dane Ortlund highlights how Jesus’ gentleness is not passive but active‚ demonstrated through His interactions with sinners and sufferers. The study guide provides reflection questions to help readers examine their own understanding of gentleness and how it contrasts with cultural perceptions. This chapter encourages believers to embrace Christ’s gentle heart as a transformative force in their lives‚ fostering humility and compassion. The guide also offers practical steps to apply this truth‚ helping readers grow in their ability to reflect Christ’s gentle nature in everyday interactions.

Chapter 3: The Depth of Humility

Chapter 3 explores the profound humility of Christ‚ highlighting how His lowliness is both a model and a gift for believers. Ortlund emphasizes that Jesus’ humility is not a temporary posture but a defining characteristic of His nature. The study guide invites readers to reflect on how Christ’s humility challenges pride and self-reliance‚ offering questions like‚ “How does Christ’s humility reshape your understanding of leadership and service?” Practical applications encourage believers to embrace humility in relationships and daily decisions‚ fostering a deeper reliance on God’s grace. This chapter underscores the transformative power of humility‚ aligning hearts with Christ’s example of selfless love and surrender.

Chapter 4: The Power of Kindness

Chapter 4 delves into the transformative power of Christ’s kindness‚ emphasizing its role in comforting sinners and sufferers. Ortlund highlights how Jesus’ kindness is not merely an action but a fundamental aspect of His character‚ offering rest to the weary. The study guide prompts readers to consider how Christ’s kindness impacts their own relationships and daily interactions‚ encouraging them to reflect on questions like‚ “How does Jesus’ kindness reshape your understanding of God’s love?” Practical applications inspire believers to embody this kindness‚ fostering compassion and grace in their lives. This chapter underscores the enduring and redemptive nature of Christ’s kindness‚ calling readers to live out this virtue in humility and love.

Chapter 5: The Intersection of Suffering and Grace

Chapter 5 explores how Christ’s gentleness and humility intersect with human suffering‚ offering hope and comfort. Ortlund emphasizes that Jesus’ lowly heart is not detached from pain but deeply engaged with it. The study guide invites readers to reflect on how Christ’s grace meets sufferers in their darkest moments‚ providing rest and renewal. Questions such as‚ “How does Christ’s gentleness speak to your own suffering?” encourage personal application. This chapter highlights the paradox of divine strength in weakness‚ reminding believers that suffering is not alien to God but is met with His tender kindness. It calls readers to trust in Christ’s compassionate heart‚ even amid hardship.

Chapter 6: The Role of Rest in Spiritual Growth

Chapter 6 delves into the significance of rest in spiritual growth‚ emphasizing Jesus’ invitation to “come to me and I will give you rest.” Ortlund highlights how rest is not passivity but an active trust in Christ’s work. The study guide explores how rest reorients believers’ souls‚ fostering peace and dependence on God. Reflection questions‚ such as “How does Jesus’ offer of rest apply to your life today?” encourage readers to seek spiritual renewal. This chapter underscores the transformative power of resting in Christ’s gentleness‚ allowing believers to find strength in surrender and trust‚ rather than self-effort. It calls for a reorientation of priorities‚ prioritizing intimacy with Christ over spiritual performance.

Chapter 7: The Yoke of Christ

Chapter 7 explores Jesus’ invitation to “take my yoke upon you‚” emphasizing the paradox of finding rest in surrender. Ortlund explains that Christ’s yoke is not a burden but a partnership‚ revealing His gentle and humble heart. The study guide reflects on how the yoke of Christ transforms believers’ lives‚ offering freedom from self-reliance. Questions like “What does it mean to take Christ’s yoke?” prompt readers to consider the practical implications of trusting Him. This chapter highlights the liberating truth that Christ’s yoke brings peace‚ not oppression‚ inviting believers to lean on His kindness and find true rest in His presence. It calls for a posture of humility and surrender.

Chapter 8: Reflection and Application

Chapter 8 focuses on applying the truths of Christ’s gentle and lowly heart to everyday life. It provides practical steps for reflecting on Jesus’ character and integrating His kindness into relationships and decisions. The study guide includes questions to help readers assess their own humility and gentleness‚ encouraging them to embrace Christ’s yoke. This chapter emphasizes the transformative power of living out Christ’s heart in daily interactions‚ offering comfort for sufferers and hope for sinners. It challenges believers to mirror Christ’s humility and kindness‚ fostering a deeper connection with Him and others‚ and inspiring a life rooted in grace and compassion. Practical application is key to spiritual growth in this final chapter.

Reflection and Application

This section guides readers in applying Christ’s gentle and lowly heart to their lives‚ offering practical steps for spiritual growth and transformative living through His grace.

Personal Reflection Questions

How has your understanding of Christ’s gentle and lowly heart deepened through this study?

In what ways do you see Jesus’ humility reflected in your own life?

How does Christ’s kindness toward sinners and sufferers inspire your interactions with others?

Identify areas where you struggle to trust in Christ’s gentleness and lowliness.

How can you practically rest in Christ’s promise of spiritual refreshment?

Reflect on a time when you experienced God’s kindness in your life. How did it transform you?

How can you share Christ’s gentle and lowly heart with others in your community?

What steps can you take to cultivate humility and kindness in your daily relationships?

These questions encourage deeper engagement with the study material and personal application of its truths.

Practical Application in Daily Life

Applying the truths from Gentle and Lowly involves embracing Christ’s heart of kindness and humility. Share His gentleness with others through compassionate actions and words. Practice humility by serving others without seeking recognition. Trust in Christ’s lowliness to find rest in life’s challenges. Reflect on His kindness daily to foster gratitude and love. Use the study guide’s questions to identify areas for personal growth. Engage in acts of kindness to mirror Christ’s heart. Cultivate a prayer life that seeks His gentle guidance. Share the hope of Christ’s gentle and lowly heart with those around you. These practices will deepen your walk with Christ and transform your relationships.

The Gentle and Lowly study guide offers profound insights into Christ’s heart‚ equipping readers to embrace His kindness‚ humility‚ and rest. It transforms lives through practical application and reflection‚ deepening faith and fostering intimacy with Christ.

Final Thoughts on the Study Guide

Dane Ortlund’s Gentle and Lowly study guide is a transformative resource‚ offering a deeper understanding of Christ’s heart. It provides practical tools for applying biblical truths‚ encouraging believers to embrace Christ’s gentleness and humility. The guide is ideal for personal reflection‚ small groups‚ or church-wide studies‚ fostering spiritual growth and intimacy with Jesus. Through its structured approach‚ it helps readers navigate the complexities of faith‚ emphasizing the kindness and rest found in Christ. This study guide is a valuable companion for anyone seeking to enrich their walk with God and live out the teachings of Scripture in daily life.

simile and metaphor worksheet pdf

Similes and metaphors are literary devices that enhance creativity and vividness in language. A simile compares two things using “like” or “as,” while a metaphor equates one thing with another, creating powerful imagery. Both tools help writers convey complex ideas in engaging ways, making descriptions more relatable and expressive for readers.

1.1 Definition of Similes

A simile is a figure of speech that compares two different things by using the words “like” or “as” to highlight their similarities. For example, “The car moved like a snail” or “She ran as fast as the wind.” Similes make descriptions more vivid and relatable, allowing readers to visualize the comparison clearly. They are essential in creative writing and everyday language, as they help convey ideas in a way that is easy to understand and engaging. Similes are often used in worksheets to teach students how to express comparisons effectively. They are a fundamental tool for enhancing communication and adding depth to expressions.

1.2 Definition of Metaphors

A metaphor is a figure of speech that directly equates one thing with another, without using “like” or “as.” It states that one object, concept, or person is another, creating a vivid and evocative comparison. For example, “The city is a jungle” or “Time is a thief.” Metaphors differ from similes by omitting the comparative words, making the connection more direct and impactful. They are widely used in literature, poetry, and everyday language to convey complex ideas or emotions in a way that is both creative and relatable. Metaphors challenge the mind to think beyond literal meanings, fostering deeper understanding and engagement with the subject matter.

1.3 Importance of Similes and Metaphors in Language

Similes and metaphors are essential tools in language, as they add depth, creativity, and vividness to communication. They help writers and speakers convey complex ideas or emotions in a way that is both relatable and engaging. By comparing two unlike things, these devices create powerful imagery that enhances understanding and fosters emotional connections. In education, worksheets focused on similes and metaphors improve critical thinking and creativity, while in literature, they enrich texts, making them more memorable. Both devices also encourage clarity and precision in expression, helping individuals articulate their thoughts more effectively. Their ability to transform abstract concepts into tangible comparisons makes them indispensable in both written and verbal communication.

Key Features of a Simile and Metaphor Worksheet

A simile and metaphor worksheet typically includes exercises like identifying similes/metaphors, rewriting sentences, and creating original comparisons. PDF versions often feature answer keys for easy feedback and self-assessment.

2.1 Structure of the Worksheet

A simile and metaphor worksheet typically begins with a brief introduction explaining the concepts. It then presents a series of exercises, such as identifying similes or metaphors in sentences, rewriting similes as metaphors, or creating original comparisons. The worksheet may also include multiple-choice questions or fill-in-the-blank activities. Many PDF versions feature a clear layout, with instructions at the top and space for writing answers. Some worksheets are divided into sections, like “Identify the Simile” or “Create a Metaphor,” to guide users step-by-step. The structure is designed to be user-friendly, making it easy for learners to practice and understand these literary devices effectively. This organized format helps educators and students alike;

2.2 Types of Exercises Included

Simile and metaphor worksheets often include a variety of exercises to engage learners. Common activities involve identifying and labeling similes or metaphors in given sentences. Another exercise is rewriting similes as metaphors or vice versa, which helps understand their differences. Some worksheets provide sentence stems or word banks for creating original comparisons. Multiple-choice questions and fill-in-the-blank tasks are also popular for reinforcing concepts. Additionally, exercises may ask students to explain the comparisons or describe the imagery created. These activities are designed to build skills in recognizing, creating, and interpreting similes and metaphors, making learning interactive and effective. Answer keys are usually provided for self-assessment and feedback.

How to Identify Similes and Metaphors

Identify similes by the presence of “like” or “as,” which highlight comparisons. Metaphors, however, equate one thing with another without using these words, creating direct associations. Both devices enhance descriptions and imagery in texts, making ideas more vivid and relatable for readers.

3.1 Identifying Similes in Sentences

Similes are comparisons that use “like” or “as” to connect two different things. For example, “The car moved like a snail” or “He ran as fast as a cheetah.” These comparisons help create vivid imagery. To identify similes, look for the words “like” or “as,” which signal the comparison. Similes are often used to make descriptions more relatable and engaging. They can appear anywhere in a sentence, but the key is to recognize the connecting words. Worksheets often include exercises where students highlight or underline these words to practice identification. This skill is essential for understanding literary devices and improving reading comprehension. Regular practice helps learners master the technique effectively.

3.2 Identifying Metaphors in Sentences

Metaphors are comparisons that directly equate one thing with another without using “like” or “as.” For example, “The city is a jungle” or “Time is a thief.” To identify metaphors, look for phrases where one object is described as if it were another, creating a vivid and indirect comparison. Unlike similes, metaphors do not use connecting words, making them more subtle but equally impactful. Worksheets often include sentences that require readers to highlight or explain the metaphorical connections. This skill enhances understanding of figurative language and deepens textual analysis. Regular practice helps learners recognize metaphors quickly and interpret their meanings effectively in various contexts.

Simile and Metaphor Worksheet Activities

Simile and metaphor worksheets offer engaging exercises to enhance language skills. Activities include identifying comparisons, rewriting similes as metaphors, and creating original ones. These tasks improve creativity and understanding of figurative language, making writing more vivid and expressive. Worksheets often provide structured practice, helping learners master these literary devices effectively.

4.1 Rewriting Similes as Metaphors

Rewriting similes as metaphors is a creative exercise that enhances understanding of figurative language; For example, the simile “The car moved like a snail” can be transformed into the metaphor “The car was a snail on the road.” This activity helps learners see how comparisons can be expressed more directly, intensifying the imagery. Worksheets often provide sentences with similes and ask students to rewrite them as metaphors, removing words like “like” or “as” and restructuring the sentence. This process deepens the connection between the two compared elements, making the description more vivid and impactful. Such exercises are a key component of simile and metaphor worksheets, fostering both creativity and analytical skills in students.

4.2 Creating Original Similes and Metaphors

Creating original similes and metaphors is a fun and imaginative activity that encourages creativity and critical thinking. Worksheets often include prompts or word banks to inspire students to craft their own comparisons. For example, using a word like “storm,” a student might write, “The storm was a furious dancer in the sky,” turning it into a metaphor. Similarly, they could create a simile like, “The sunset glowed as warmly as a cozy fireplace.” This exercise helps students understand how to vividly describe people, places, or feelings by drawing unique connections; By practicing this skill, learners develop a stronger grasp of figurative language and enhance their writing abilities. Such activities are a valuable part of simile and metaphor worksheets, fostering innovation and self-expression.

Benefits of Using a PDF Worksheet

PDF worksheets offer accessibility and convenience, providing clear structures and answer keys for easy learning and feedback, ideal for homework and in-class activities.

5.1 Accessibility and Convenience

PDF worksheets for similes and metaphors are highly accessible, offering a convenient way to practice and learn literary devices. They can be easily downloaded and printed, ensuring students have a tangible resource for homework or classwork. The structured format of PDFs provides clarity, helping learners focus on specific skills like identifying similes and metaphors or rewriting sentences. Additionally, PDFs are compatible with most devices, allowing users to access them anytime, even without internet connectivity. This portability and versatility make PDF worksheets an ideal choice for educators and students seeking flexible learning tools. Their clear layout and offline availability enhance the learning experience, ensuring uninterrupted practice and understanding of these essential literary concepts.

5.2 Answer Key and Feedback

The inclusion of an answer key in a simile and metaphor worksheet PDF is invaluable for learners. It provides clear, correct answers to exercises, enabling students to assess their understanding and identify areas for improvement. Feedback sections offer explanations for each answer, helping learners grasp why certain comparisons are classified as similes or metaphors. This feature is particularly beneficial for self-study, as it guides students through the learning process and clarifies any confusion. The answer key and feedback also serve as a teaching tool, allowing educators to track progress and address common misconceptions. By combining answers with explanatory feedback, the worksheet becomes a comprehensive resource for mastering literary devices, fostering both independent learning and classroom instruction.

pit boss pro series 850 manual

The Pit Boss Pro Series 850 Manual guides users through optimal setup, operation, and maintenance of this versatile wood pellet grill. It ensures peak performance and safety.

1.1 Overview of the Pit Boss Pro Series 850 Pellet Grill

The Pit Boss Pro Series 850 Pellet Grill offers 8-in-1 cooking versatility, allowing users to sear, smoke, BBQ, roast, char-grill, braise, bake, and grill. It features a temperature range of 82–260°C, digital PID control, Wi-Fi and Bluetooth connectivity, and a 9kg hopper capacity. The grill’s design includes porcelain-coated grates and a slide-plate flame broiler for achieving perfect sear marks.

1.2 Importance of the Manual for Optimal Performance

The manual is essential for unlocking the full potential of the Pit Boss Pro Series 850. It provides detailed guidance on setup, operation, and maintenance, ensuring users avoid common mistakes and achieve consistent results. The manual also covers troubleshooting, safety precautions, and advanced features, helping users maximize their grilling experience and maintain the grill’s longevity for years to come.

Key Features and Specifications of the Pit Boss Pro Series 850

The Pit Boss Pro Series 850 boasts a 5,484 sq. cm. cooking area, 9 kg. hopper, 82-260°C temperature range, and advanced digital PID control with Wi-Fi/Bluetooth connectivity.

2.1 Cooking Area and Hopper Capacity

The Pit Boss Pro Series 850 offers a spacious 5,484 sq. cm. cooking area, ideal for large gatherings. Its 9 kg. hopper capacity ensures long cooking sessions without pellet refills, making it perfect for both smoking and high-heat grilling needs. This combination provides convenience and versatility for any cooking scenario;

2.2 Temperature Range and Digital PID Control

The Pit Boss Pro Series 850 features a wide temperature range of 82 to 260°C for precise control. Equipped with a digital PID control board, it maintains consistent temperatures, ensuring even cooking. This advanced system allows for seamless adjustments, making it ideal for both low-and-slow smoking and high-heat searing, delivering professional-grade results every time.

2.3 Wi-Fi and Bluetooth Connectivity

The Pit Boss Pro Series 850 offers Wi-Fi and Bluetooth connectivity, enabling remote monitoring and control via the Pit Boss app. This feature allows users to adjust temperatures, monitor cooking progress, and receive notifications from their smartphone or tablet. It enhances convenience, making it easier to achieve perfect results without constant supervision of the grill.

Setting Up the Pit Boss Pro Series 850

This section guides you through the unboxing, initial assembly, and first-time setup of the Pit Boss Pro Series 850, ensuring a smooth start to your grilling experience.

3.1 Unboxing and Initial Assembly

Begin by carefully unboxing the Pit Boss Pro Series 850 and inspecting all components. Follow the manual’s step-by-step assembly guide to attach shelves, wheels, and other accessories. Ensure all parts are securely tightened for stability and safety before first use.

3.2 Connecting to Wi-Fi and Bluetooth

Connect your Pit Boss Pro Series 850 to Wi-Fi and Bluetooth for smart control. Download the Pit Boss app, enable the grill’s Wi-Fi, and follow in-app instructions to link your device. Bluetooth pairing allows convenient proximity control, while Wi-Fi enables remote monitoring. Ensure a stable internet connection for seamless functionality and real-time temperature adjustments via the digital PID control board.

3.3 First-Time Use and Calibration

Preheat the Pit Boss Pro Series 850 to ensure proper initial function. Check for smoke to confirm pellet ignition. Adjust the digital PID settings for accurate temperature control. Ensure pellets are flowing freely. Follow safety guidelines and refer to the manual for detailed calibration steps. This setup ensures optimal performance and even cooking results.

Operating the Pit Boss Pro Series 850

Mastering the Pit Boss Pro Series 850 involves understanding its digital PID control, pellet management, and monitoring systems. Regular operation ensures consistent cooking results and optimal performance.

4.1 Understanding the Control Panel and Digital Interface

The Pit Boss Pro Series 850 features a user-friendly control panel with a digital PID interface. This system allows precise temperature adjustment, pellet level monitoring, and access to advanced cooking modes. The digital interface includes a clear LCD display for easy navigation and customization of settings, ensuring efficient and controlled cooking experiences.

4.2 Loading and Managing Wood Pellets

The Pit Boss Pro Series 850 has a 20-pound hopper capacity, allowing extended cooking sessions. Load pellets through the easy-pellet-cleanout door, ensuring proper flow. Regularly check pellet quality and store them in a dry place to maintain optimal performance and flavor consistency during cooks.

4.3 Adjusting Temperature and Monitoring Cooks

The Pit Boss Pro Series 850 features a digital PID control for precise temperature adjustment between 82°F and 260°C. Use the control panel or Wi-Fi/Bluetooth app to set and monitor temperatures. The smoke profile setting enhances flavor consistency. Regularly check pellet levels and adjust as needed for optimal cooking performance and even results.

Maintenance and Cleaning

Regular cleaning of grates and emptying the pellet hopper ensures optimal performance. Lubricate moving parts and clean the fire pot after each use for longevity. Always store the grill with a protective cover to prevent rust and damage, ensuring it remains in great condition for years.

5.1 Regular Cleaning and Lubrication

Regular cleaning involves brushing grates, emptying the pellet hopper, and vacuuming ash. Lubricate the grease bucket and auger regularly. Clean the fire pot after each use to prevent buildup. Always check and replace worn-out parts. Proper maintenance ensures smooth operation and longevity of the Pit Boss Pro Series 850 grill for consistent results.

5.2 Troubleshooting Common Issues

Common issues include temperature fluctuations, pellet jams, and app connectivity problems. Check pellet quality, clean the auger, and ensure proper Wi-Fi connection. Reset the control panel if necessary. Refer to the manual for detailed troubleshooting steps to resolve these issues efficiently and maintain optimal grill performance.

5.3 Storage and Winterization Tips

Proper storage and winterization ensure longevity. Clean the grill thoroughly, use a grill cover, protect from moisture, and store in a dry place. Remove excess pellets, clean the hopper, and let the grill dry. Follow these steps to maintain your Pit Boss Pro Series 850 during the off-season.

Advanced Features and Cooking Techniques

The Pit Boss Pro Series 850 offers advanced features like 8-in-1 cooking versatility and a slide-plate flame broiler for perfect sear marks and enhanced smoke flavor, making it ideal for expert grilling techniques.

6.1 Using the 8-in-1 Cooking Versatility

The Pit Boss Pro Series 850 excels with its 8-in-1 functionality, allowing users to sear, smoke, BBQ, roast, char-grill, braise, bake, and grill. This versatility ensures diverse cooking experiences, catering to various culinary preferences and skill levels, making it a comprehensive tool for both novice and experienced chefs.

6.2 Leveraging the Slide-Plate Flame Broiler

The slide-plate flame broiler on the Pit Boss Pro Series 850 allows for direct flame grilling, reaching up to 1,000°F. This feature enhances searing capabilities while maintaining the grill’s versatility. It ensures crispy, smoky results, perfect for achieving professional-grade sear marks and adding a charbroiled flavor to meats, making it a standout feature for advanced cooking techniques. Proper use maximizes its potential for diverse dishes.

6.3 Achieving Perfect Sear Marks and Smoke Flavor

The Pit Boss Pro Series 850 excels at delivering crisp sear marks and rich smoke flavor. Using the slide-plate flame broiler, users can achieve direct grilling at high temperatures, while the digital PID control ensures consistent smoke levels. This combination allows for professional-grade searing and infuses dishes with authentic, smoky flavors, enhancing any cooking experience. Preheating and proper pellet management are key to optimal results.

Customer Reviews and Feedback

Users praise the Pit Boss Pro Series 850 for its 8-in-1 versatility, robust build, and value for money. Many highlight its excellent searing capabilities and smoke flavor consistency. However, some note occasional app connectivity issues and temperature fluctuations. Overall, it’s well-regarded for its performance and durability, making it a popular choice among pellet grill enthusiasts.

7.1 User Experiences and Satisfaction

Users of the Pit Boss Pro Series 850 often highlight its exceptional performance, versatility, and value for money. Many praise its ability to deliver consistent results, with the 8-in-1 cooking functionality being a standout feature. The grill’s sturdy build and ease of use contribute to high satisfaction levels. However, some users have noted occasional app connectivity issues and temperature fluctuations during cooking sessions.

7.2 Common Praises and Complaints

The Pit Boss Pro Series 850 is often praised for its 8-in-1 versatility, excellent searing capabilities, and robust build quality. However, some users have reported issues with app connectivity, occasional temperature fluctuations, and mixed experiences with customer service. These points highlight both the grill’s strengths and areas for improvement;

7.3 Tips from Seasoned Pit Boss 850 Users

Experienced users recommend preheating the grill, using high-quality pellets, and regular cleaning for optimal performance. They also suggest leveraging the Wi-Fi features for remote monitoring and experimenting with cooking techniques to enhance flavor. Proper storage and maintenance are emphasized to extend the grill’s lifespan and ensure consistent results.

Comparisons with Other Pit Boss Models

The Pit Boss Pro Series 850 stands out for its larger cooking area, advanced PID control, and Wi-Fi connectivity compared to other models, offering enhanced versatility and performance.

8.1 Pit Boss Pro Series 850 vs. Competition Series 850

Both models share the same cooking area, but the Pro Series 850 offers a higher temperature range, digital PID control, and advanced Wi-Fi connectivity. The Competition Series 850 is more portable and includes a better warranty, making it ideal for competitive cooking. Choose based on your needs for smart features or mobility.

8.2 Differences in Features and Performance

The Pro Series 850 excels with its 8-in-1 cooking versatility, slide-plate flame broiler, and digital PID control for precise temperatures. The Competition Series 850 focuses on portability and durability, featuring a legacy Wi-Fi control board. Performance-wise, the Pro Series offers better temperature consistency, while the Competition Series is tailored for on-the-go use and competitions.

8.3 Which Model is Right for You?

Choose the Pro Series 850 for home use, offering advanced features like Wi-Fi, Bluetooth, and precise temperature control. Opt for the Competition Series 850 if you prioritize portability and durability, ideal for competitive events. Your decision depends on whether you value smart technology or rugged, competition-ready design for your grilling needs.

Accessories and Upgrades for the Pit Boss 850

Enhance your grilling experience with grill covers, flame broiler kits, and additional tools designed to maximize the performance of your Pit Boss 850 pellet grill.

9.1 Recommended Grill Covers and Protective Gear

A high-quality grill cover is essential to protect your Pit Boss 850 from the elements. Look for heavy-duty, waterproof covers specifically designed for the Pro Series. Additional protective gear like heat-resistant gloves and cleaning brushes can enhance maintenance and safety. These accessories help extend the lifespan and performance of your grill.

9.2 Upgrading the Flame Broiler and Grill Grates

Upgrading the flame broiler with a slide-plate kit enhances searing capabilities, allowing direct flame access for perfect sear marks. Replacing or seasoning grill grates with porcelain-coated options improves durability and prevents rust. These upgrades ensure consistent performance and maintain the grill’s high-quality cooking standards for years to come.

9.3 Additional Tools for Enhanced Cooking

Enhance your cooking experience with tools like grill brushes, meat thermometers, and smoking tubes. A pellet cleanout door simplifies pellet management, while a folding front shelf adds prep space. Wi-Fi and Bluetooth compatibility enable app monitoring, ensuring precise control over your cooks for optimal results every time.

The Pit Boss Pro Series 850 Manual is a valuable resource for mastering this versatile pellet grill. It empowers users to unlock the grill’s full potential with confidence.

10.1 Summary of the Pit Boss Pro Series 850 Manual

The Pit Boss Pro Series 850 Manual provides comprehensive guidance on setup, operation, and maintenance, ensuring users can maximize the grill’s advanced features like 8-in-1 cooking versatility and digital PID control. It also covers troubleshooting and care tips, helping users enhance their cooking techniques and resolve common issues effectively for optimal grilling experiences.

10.2 Final Recommendations for Users

For optimal results, regularly clean and maintain the grill, ensuring proper lubrication and pellet quality. Explore the 8-in-1 cooking functions to diversify your dishes. Monitor temperatures via the app but remain patient with connectivity. Follow the manual’s guidelines for troubleshooting and storage to extend the grill’s lifespan and performance. Happy grilling!

bible games for youth pdf

Bible games are engaging tools for making Bible study fun and interactive for young people. They help youth groups connect with scripture through creative activities and competitions‚ fostering spiritual growth and teamwork while ensuring an enjoyable learning experience. Many free printable resources‚ such as Bible games PDFs‚ are available online to simplify planning for leaders.

1.1 Importance of Bible Games in Youth Ministry

Bible games play a vital role in youth ministry by making spiritual lessons engaging and relatable. They create an interactive environment where young people can deepen their understanding of scripture while having fun. These activities foster teamwork‚ encourage participation‚ and help reinforce biblical teachings in a memorable way. Additionally‚ games like trivia‚ charades‚ and word searches provide practical tools for leaders to connect with youth‚ ensuring that Bible study is both enjoyable and impactful. By incorporating these elements‚ Bible games help young individuals build a stronger spiritual foundation while creating lasting experiences.

1.2 Overview of Printable Bible Games for Youth

Printable Bible games for youth offer a wide range of engaging and educational activities designed to deepen spiritual understanding. These resources‚ available in formats like PDF or Word documents‚ include games such as trivia quizzes‚ word searches‚ crossword puzzles‚ and charades. They are easily accessible and can be downloaded for free from various online platforms. Many of these games are tailored for different age groups‚ ensuring they are age-appropriate and relevant. They are ideal for use in youth group meetings‚ Sunday schools‚ and home Bible studies. The versatility of these games allows them to be adapted to various settings‚ making them a valuable tool for youth ministers and parents seeking to make Bible study both fun and impactful for young people.

Types of Bible Games for Youth

Popular Bible games include trivia quizzes‚ charades‚ hidden books‚ word searches‚ and crosswords‚ all designed to engage young minds in fun‚ faith-building activities.

2.1 Bible Trivia Games

Bible trivia games are a popular and interactive way to teach youth about scripture. These games often involve answering questions based on Bible verses‚ characters‚ or events. They can be played individually or in teams‚ making them ideal for group settings like youth groups or Sunday schools. Trivia questions can range from simple to challenging‚ catering to different age groups and knowledge levels; Many free printable Bible trivia games are available in PDF format‚ offering a convenient way to prepare for activities. These games not only educate but also encourage healthy competition and teamwork. They are an effective tool for reinforcing Bible lessons and making learning fun and engaging for young people.

2.2 Bible Charades

Bible Charades is a fun and interactive game where players act out Bible-related terms‚ stories‚ or characters without speaking. This game is perfect for engaging youth in a creative way while reinforcing their knowledge of scripture. It can be played in teams or individually‚ making it suitable for various group sizes. The game encourages creativity‚ teamwork‚ and physical expression‚ allowing young people to connect with Bible stories in a dynamic manner. Free printable PDF resources are available online‚ offering pre-prepared charade cards with Bible-themed words or phrases‚ such as “Noah’s Ark” or “The Ten Commandments.” This activity is both entertaining and educational‚ making it a great addition to youth ministry programs.

2.3 Hidden Books of the Bible Games

Hidden Books of the Bible games are a popular and engaging activity for youth groups‚ designed to enhance Bible knowledge and sharpens attention to detail. In this game‚ participants are given a paragraph of text containing the names of Bible books hidden within it. The goal is to locate and list all the hidden books‚ which can be a fun and challenging task. These games are often available as free printable PDFs‚ making them easy to access and use. They are ideal for youth ministry‚ Vacation Bible School‚ and small group settings‚ helping young people develop familiarity with the Bible in an interactive and enjoyable way.

2.4 Bible Word Search and Crossword Puzzles

Bible word searches and crossword puzzles are excellent tools for engaging youth in scripture-based activities. These games are designed to be both educational and entertaining‚ helping young people learn key Bible verses‚ characters‚ and themes in a fun and interactive way. Word searches typically involve finding and circling words hidden within a grid of letters‚ while crosswords require filling in answers to Bible-related questions. Many websites offer free printable PDF versions of these puzzles‚ making them easily accessible for youth leaders. They are ideal for Sunday school‚ Bible study groups‚ or family time‚ encouraging young minds to engage deeply with biblical content while enjoying the challenge of solving the puzzles.

Choosing the Right Games for Your Youth Group

Selecting age-appropriate and engaging Bible games ensures youth participate actively and benefit spiritually. Consider group size and skill levels to maximize fun and learning effectiveness for everyone involved.

3.1 Age-Appropriateness of Bible Games

Age-appropriateness is crucial when selecting Bible games for youth. Games designed for younger children‚ such as word searches or simple trivia‚ help them engage with basic biblical concepts. For teenagers‚ more complex activities like Bible charades or hidden books games challenge their knowledge and encourage deeper reflection. Ensuring the game matches the age group’s understanding and interests fosters participation and spiritual growth. Leaders should review game content to align with the maturity level of their group‚ making activities both enjoyable and meaningful. This tailored approach ensures that youth of all ages can benefit from the games and connect with the teachings effectively.

3.2 Group Size Considerations

Group size plays a significant role in selecting effective Bible games for youth. Smaller groups allow for more personalized interaction and deeper engagement‚ making games like Bible charades or word searches ideal. Larger groups benefit from team-based activities‚ such as trivia competitions or relay races‚ which promote collaboration and excitement. Leaders should choose games that accommodate the number of participants‚ ensuring everyone can actively partake without feeling overlooked. Adjusting game complexity and duration based on group size helps maintain focus and enthusiasm. Additionally‚ games that encourage participation from all members‚ regardless of group size‚ foster a sense of community and shared learning.

Benefits of Using Bible Games in Youth Ministry

Bible games make learning fun‚ engaging‚ and memorable for youth. They reinforce spiritual lessons‚ foster teamwork‚ and create an interactive environment for deeper biblical understanding and application;

4.1 Engaging Youth in Bible Study

Bible games are a powerful way to engage young people in Bible study‚ making it fun and interactive. These activities help youth connect with scripture in a relatable manner‚ fostering curiosity and participation. By incorporating games like trivia‚ charades‚ and word searches‚ leaders can create an environment where learning is enjoyable and memorable. Games also encourage teamwork and camaraderie‚ breaking down barriers and making Bible study accessible to all. This approach not only deepens understanding but also helps youth apply biblical lessons to their daily lives. With free printable resources like Bible games PDFs‚ leaders can easily plan engaging sessions that captivate young minds and inspire spiritual growth. This method ensures that Bible study is not just educational but also an exciting experience for youth.

4.2 Reinforcing Spiritual Lessons Through Fun Activities

Bible games are an effective way to reinforce spiritual lessons by making them engaging and memorable. Interactive activities‚ such as Bible charades or trivia‚ help youth apply biblical teachings to real-life situations. These games create a relaxed environment where young people can learn and reflect on scripture without feeling pressured. By incorporating fun elements‚ leaders can ensure that spiritual lessons resonate longer and inspire practical application. Games also encourage teamwork and collaboration‚ fostering a sense of community while deepening faith. With resources like Bible games PDFs‚ leaders can easily access activities that align with their teachings‚ making spiritual growth both enjoyable and impactful for youth. This approach ensures lessons are retained and lived out beyond the classroom.

How to Create Custom Bible Games for Your Group

Design games that align with your group’s interests and lesson themes. Use free Bible games PDFs as templates or create unique activities that encourage participation and learning. Incorporate scripture-based challenges‚ puzzles‚ or trivia to make sessions engaging and meaningful for youth. Ensure the games are adaptable to different ages and group sizes for maximum impact. This approach allows leaders to tailor activities to their ministry goals while keeping young people entertained and spiritually enriched.

5.1 Designing Bible Trivia Questions

Creating Bible trivia questions is a great way to engage youth in scripture. Start by selecting verses or stories relevant to your group’s current study. Ensure questions are age-appropriate‚ with a mix of easy and challenging ones to cater to all participants. Use free Bible games PDFs as inspiration or templates. Include questions about key Bible characters‚ events‚ and teachings. Consider adding fun twists‚ like team-based rounds or timed answers‚ to keep the game lively. Make sure to balance factual questions with reflective ones that encourage deeper thinking. This approach not only reinforces Bible knowledge but also fosters teamwork and spiritual growth in a fun‚ interactive way. Adapt the questions to suit your group’s size and preferences for maximum engagement. By designing meaningful and varied trivia‚ you can create a memorable experience for your youth group. This method ensures that learning is both enjoyable and impactful‚ helping young people connect with God’s Word in a relatable manner.

5.2 Creating Interactive Bible Games

Interactive Bible games are excellent for capturing the attention of young people and making Bible study dynamic. Consider creating games like Bible charades‚ where participants act out scripture verses‚ or word-based activities like word searches or crossword puzzles. Utilize free Bible games PDFs as templates for designing these activities. Ensure the games are tailored to the age and interests of your group. For example‚ younger teens might enjoy scavenger hunts or matching games‚ while older teens can engage in more complex challenges like decoding Bible verses or solving puzzles. The key is to balance fun with spiritual learning‚ ensuring the games reinforce biblical lessons while keeping everyone entertained. Incorporating teamwork and prizes can further enhance participation and enthusiasm‚ making the experience both enjoyable and meaningful for the youth. By designing interactive games‚ you can create a lively atmosphere that fosters both engagement and spiritual growth‚ helping young people connect with God’s Word in a memorable way. These activities can also be adapted to fit various group sizes and settings‚ making them versatile tools for youth ministry. Always aim to create a balance between fun and faith‚ ensuring the games serve their purpose of deepening biblical understanding while keeping the youth engaged and excited about learning. This approach not only makes Bible study more accessible but also creates lasting impressions and a stronger connection to scripture for young believers.

Keeping it Fun: Incorporating Prizes and Rewards

Incorporating prizes and rewards into Bible games motivates participation and excitement. Offer small incentives like gift cards‚ treats‚ or extra points to winners‚ ensuring fun aligns with spiritual growth.

6.1 Using Incentives to Encourage Participation

Using incentives is a powerful way to boost participation in Bible games. Offering prizes such as gift cards‚ small treats‚ or Bible-themed items motivates youth to engage actively. Many free PDF resources provide creative ideas for rewards‚ ensuring that the focus remains on spiritual growth while fostering excitement. Incentives can be tailored to the game’s theme‚ making the experience more meaningful. For example‚ awarding points or badges encourages teamwork and individual effort. Prizes also create a sense of achievement‚ helping youth feel recognized for their involvement. This approach ensures that fun and learning go hand in hand‚ keeping young participants enthusiastic and invested in the activities.

6.2 Balancing Fun and Spiritual Growth

Balancing fun and spiritual growth is essential when using Bible games in youth ministry. While games are meant to engage and entertain‚ their primary purpose is to deepen spiritual understanding. Structured activities like Bible trivia or charades can reinforce lessons and encourage reflection. Leaders should ensure that the games align with the spiritual goals of the group‚ fostering a connection between enjoyment and learning. Incorporating scripture-based challenges helps youth internalize biblical teachings. The key is to create an environment where fun leads to meaningful conversations and a stronger faith foundation. By blending entertainment with purposeful lessons‚ Bible games become a valuable tool for holistic youth development.

Bible games are a powerful tool for engaging youth in spiritual growth while fostering fun and teamwork. They provide an interactive way to explore scripture‚ making Bible study relatable and enjoyable. With resources like free Bible games PDFs‚ leaders can easily access activities tailored for various ages and group sizes. These games not only reinforce biblical lessons but also create memorable experiences that deepen faith. By balancing entertainment with spiritual learning‚ Bible games help youth ministries achieve their goals effectively. Their versatility and accessibility make them an invaluable asset for nurturing young believers and encouraging lifelong discipleship in a dynamic and engaging way.

orbit instruction manual

Welcome to the Orbit Instruction Manual‚ your comprehensive guide to understanding and utilizing the Orbit sprinkler timer system. This manual provides detailed instructions for installation‚ programming‚ and troubleshooting‚ ensuring efficient and reliable operation of your irrigation system. Designed to help you manage watering schedules effortlessly‚ the Orbit system offers advanced features for optimal water usage and convenience.

Purpose and Scope of the Manual

This manual is designed to guide users in setting up and operating the Orbit sprinkler timer effectively. It provides detailed instructions for establishing watering schedules‚ programming the timer‚ and troubleshooting common issues. Intended for homeowners and installers‚ the manual covers essential features‚ safety precautions‚ and technical specifications. It ensures proper installation‚ efficient water usage‚ and compliance with standards like UL-1951 and CE approval. By following this guide‚ users can optimize their irrigation system’s performance and maintain a healthy lawn with minimal effort.

Key Features of the Orbit System

The Orbit system offers advanced features for efficient irrigation control. It includes a user-friendly programming interface‚ multiple watering schedules‚ and manual mode operations. The system supports up to 24 VAC irrigation valves and is compatible with various accessories. With UL-1951 compliance and CE approval‚ it ensures safety and reliability. Additional features like automatic scheduling and error code alerts enhance functionality‚ making it a versatile solution for modern irrigation needs. These features simplify water management and provide a seamless user experience for both residential and small-scale commercial applications.

System Components and Accessories

The Orbit system includes a range of hardware components‚ such as timers‚ valves‚ and sensors‚ along with accessories like remote controls and mounting brackets. These components ensure seamless integration and operation of the irrigation system‚ providing users with the tools needed for efficient water management and customization of their setup.

Hardware Components of the Orbit Timer

The Orbit Timer consists of essential hardware components designed for reliable operation. The main unit houses the control board‚ managing all system functions. Solenoid wires connect to 24VAC valves‚ enabling water flow control. A rain sensor is included to prevent overwatering during rainfall. The system also features a flow control adjustment for precise water distribution. Additionally‚ a wiring harness ensures secure connections between components‚ and the timer includes a battery compartment for backup power during outages. These components work together to ensure efficient and automated irrigation management.

Software and Digital Interfaces

The Orbit Timer features an intuitive software interface for seamless programming and control. The digital interface allows users to set schedules‚ adjust watering durations‚ and monitor system status. Compatible with select Orbit models‚ the software offers advanced features like weather-based adjustments and remote access through the Orbit app. The interface supports multiple zones and enables manual overrides for flexibility. Regular software updates ensure optimal performance and compatibility with new devices‚ enhancing user experience and system reliability. This integration of software and hardware provides a user-friendly solution for modern irrigation needs.

Installation and Setup

Mount the Orbit Timer securely‚ connect wires to the appropriate valves‚ and set the clock. Test the system to ensure proper operation and secure all connections.

Preparation Steps for Installation

Before installing the Orbit Timer‚ ensure the power is off at the circuit breaker. Gather all necessary tools and components‚ including the timer‚ valves‚ and wiring. Verify compatibility with your irrigation system and check for any existing damage. Read the manual thoroughly to understand the setup process. Test the valves manually to ensure they function properly. Plan the wiring layout to avoid complications during installation. Ensure all connections are secure and follow safety guidelines to prevent electrical hazards.

Physical Installation of the Orbit Timer

Mount the Orbit Timer securely to a flat surface using the provided mounting screws. Ensure the timer is level and properly aligned with the valve wiring; Connect the wires from the valves to the corresponding terminals on the timer‚ matching the zone labels. Secure all wire connections tightly to prevent loose contacts. Verify the timer is oriented correctly‚ with the display facing upward for easy access. Double-check all connections before proceeding to power the system; Ensure the timer is installed in a location protected from direct sunlight and moisture.

Connecting the Orbit System to a Power Source

Connect the Orbit Timer to a 24VAC power source using the provided transformer. Ensure the power cord is securely plugged into both the timer and a nearby electrical outlet. Verify the voltage rating matches the transformer’s specifications to avoid damage. Turn on the power and check for any LED indicators or display lights to confirm the system is powered on. Test the timer’s basic functions to ensure proper operation. Avoid exposing the timer to direct water contact or extreme temperatures during operation.

Programming the Orbit Timer

Program your Orbit Timer by accessing the interface‚ setting the clock‚ and creating customizable watering schedules. Adjust settings and use manual mode for flexibility.

Overview of the Programming Interface

The programming interface of the Orbit Timer is user-friendly‚ featuring an LCD display and intuitive buttons for navigation. It allows users to set the clock‚ customize watering schedules‚ and adjust settings. The interface provides clear options for selecting zones‚ adjusting durations‚ and enabling manual mode. With a straightforward layout‚ it ensures easy access to all functions‚ making it simple to manage your irrigation system efficiently. Real-time feedback on the screen helps confirm your settings‚ ensuring accurate programming every time.

Setting the Clock and Basic Parameters

Setting the clock and basic parameters on the Orbit Timer ensures accurate operation. To begin‚ press the MANUAL button and use the arrow keys to select the current time and date. Adjust the time using the +/– buttons and press ENTER to save. Next‚ set the watering parameters‚ such as start time and frequency‚ by navigating through the menu options. Ensure all settings are confirmed by pressing ENTER after each adjustment. Proper setup guarantees your irrigation schedule operates smoothly and efficiently‚ aligning with your specific needs.

Creating and Managing Watering Schedules

To create a watering schedule‚ press the MENU button and navigate to the scheduling section using the arrow keys. Select the desired zone and set the start time‚ frequency‚ and duration using the +/– buttons. Press ENTER to save. For multiple zones‚ repeat the process. You can customize schedules for different days of the week or set a one-time operation. Review and modify schedules as needed to optimize water usage and adapt to weather conditions. Proper scheduling ensures efficient irrigation tailored to your lawn’s needs.

Manual Mode Operations and Adjustments

To activate manual mode‚ press the MANUAL button and use the arrow keys to select the desired zone. Adjust the watering duration with the +/– buttons and press ENTER to start. During manual operation‚ you can pause or stop watering by pressing the STOP button. For immediate adjustments‚ use the MANUAL button to override scheduled settings temporarily. This feature allows flexibility for unexpected watering needs or fine-tuning without altering the programmed schedule. Ensure proper zone selection and duration settings for accurate manual control of your irrigation system.

Troubleshooting Common Issues

Troubleshooting Common Issues with the Orbit Timer: Identify and resolve problems like error codes‚ connectivity issues‚ and system malfunctions using the detailed solutions provided in this section.

Identifying and Diagnosing Common Problems

Identifying issues with the Orbit Timer begins with checking error codes displayed on the screen. Common problems include improper watering schedules‚ faulty sensors‚ or disrupted power supply. Verify connections to ensure valves and sensors are securely linked. If the timer fails to activate‚ reset it by pressing and holding the reset button for 10 seconds. For persistent issues‚ consult the manual or contact technical support for assistance. Regularly inspecting the system and addressing minor issues promptly can prevent major malfunctions and ensure optimal performance.

Resetting the Orbit Timer to Factory Settings

To reset the Orbit Timer to factory settings‚ press and hold the reset button located on the back or bottom of the device for 10-15 seconds. This action will restore default settings‚ erasing all custom programming and schedules. After releasing the button‚ the timer will restart with initial factory configurations. Note that all previously set watering schedules and preferences will be lost. If issues persist after the reset‚ refer to the troubleshooting section or contact Orbit technical support for further assistance.

Addressing Error Codes and Alarms

If the Orbit Timer displays an error code or triggers an alarm‚ refer to the manual for specific code definitions. Common issues include faulty sensors‚ incorrect programming‚ or low power. Check wiring connections and ensure the system is properly powered. Resetting the timer to factory settings may resolve some errors. For persistent issues‚ contact Orbit technical support for assistance. Keeping the software updated can also prevent recurring alarms and ensure smooth operation of the irrigation system.

Safety Precautions and Guidelines

Ensure safe installation and operation by following electrical safety guidelines and avoiding water exposure to electrical components. Use only with cold water outdoors for optimal performance and longevity.

Electrical Safety Considerations

Always follow electrical safety guidelines to prevent hazards. Install the Orbit system outdoors‚ using only cold water to avoid damage. Keep electrical components away from water exposure to ensure safe operation. Verify proper grounding and avoid overloading circuits. Never modify the device or bypass safety features. Ensure all connections are secure and comply with local electrical codes. If unsure‚ consult a licensed electrician for installation. Regularly inspect wiring and components for damage or wear. Avoid using damaged cords or plugs‚ and keep the system out of reach of children and pets.

Environmental and Usage Guidelines

Use the Orbit system responsibly to ensure optimal performance and environmental safety. Install the timer outdoors‚ as it is designed for exterior use with cold water only. Avoid spraying water near electrical connections to prevent damage or hazards. Protect the timer from extreme weather conditions and ensure it is securely mounted to prevent damage. Regularly inspect and maintain the system to prevent leaks or water waste. Drain the system seasonally in freezing temperatures to avoid damage. Always follow local water usage regulations and consider eco-friendly settings to conserve resources.

Warranty and Technical Support

Orbit products are backed by a comprehensive warranty. For assistance‚ contact Orbit Technical Support at 1-800-488-6156. The system complies with UL-1951 standards‚ ensuring reliability and safety.

Understanding the Orbit Warranty

The Orbit warranty ensures your product is protected against defects in materials and workmanship. Most Orbit timers and accessories are covered for a minimum of one year from the date of purchase. The warranty does not cover damage caused by improper installation‚ misuse‚ or normal wear and tear. To validate your warranty‚ retain your purchase receipt and register your product online. For warranty claims or inquiries‚ contact Orbit Technical Support at 1-800-488-6156. Proper registration ensures seamless assistance and extends product reliability.

Contacting Orbit Technical Support

For assistance with your Orbit product‚ contact our dedicated Technical Support team at 1-800-488-6156. Representatives are available to address installation‚ operation‚ and troubleshooting issues. Visit the official Orbit website for additional resources‚ including manuals‚ FAQs‚ and support articles. For convenience‚ you can also submit inquiries via email or through the online support portal. Ensure you have your product model number and purchase details ready for efficient service. Orbit prioritizes customer satisfaction‚ offering timely solutions to ensure optimal product performance and user experience.

By following this manual‚ you’ve successfully set up and customized your Orbit system for efficient irrigation. Regular maintenance and adherence to guidelines ensure long-term performance. Remember to refer to troubleshooting sections for quick solutions. For further assistance‚ contact Orbit Technical Support. Happy watering!

nikon d3300 instruction manual

The Nikon D3300 is an entry-level DSLR camera designed for new photographers and hobbyists. It features a 24.2-megapixel CMOS sensor, EXPEED 4 image processor, and Nikon F-mount compatibility, offering excellent image quality and versatility. This guide provides a comprehensive overview of its features, setup, and usage, helping users master the camera’s capabilities for stunning photography.

1.1 Overview of the Camera

The Nikon D3300 is a user-friendly DSLR camera designed for beginners and hobbyists. It features a 24.2-megapixel CMOS sensor, EXPEED 4 image processor, and compatibility with Nikon F-mount lenses. The camera offers intuitive controls, Live View mode, and Full HD video recording, making it ideal for capturing high-quality photos and videos with ease.

1.2 Importance of the Instruction Manual

The instruction manual is essential for understanding the Nikon D3300’s features, settings, and troubleshooting. It provides detailed guidance on optimizing camera performance, customizing settings, and resolving common issues. Referencing the manual ensures users can fully utilize the camera’s capabilities and enhance their photography skills effectively. It is available in both physical and digital formats.

Key Features of the Nikon D3300

The Nikon D3300 boasts a 24.2-megapixel CMOS sensor, EXPEED 4 image processor, and compatibility with Nikon F-mount lenses, delivering sharp images and enhanced performance for photographers of all skill levels.

2.1 24.2-Megapixel CMOS Sensor

The Nikon D3300 features a 24.2-megapixel CMOS sensor, capturing detailed and vibrant images. This sensor excels in various lighting conditions, delivering crisp photos with minimal noise. Its high resolution ensures sharpness and clarity, while advanced noise reduction technology enhances image quality, making it ideal for photographers seeking professional-grade results with ease and precision.

2.2 EXPEED 4 Image Processor

The EXPEED 4 processor enhances image quality, reduces noise, and improves processing speed. It supports high-speed shooting and advanced autofocus, enabling precise subject tracking. This processor also optimizes battery life and supports Full HD video recording, making it a crucial component for capturing sharp, detailed images efficiently in various shooting conditions.

2.3 Nikon F-Mount Compatibility

The Nikon D3300 supports the Nikon F-mount, enabling compatibility with a wide range of lenses, including AF-S DX and AF-S FX lenses. This versatility allows photographers to choose from various focal lengths and specialized optics, enhancing creativity and flexibility in capturing diverse subjects and scenes with precision and clarity.

Setting Up the Camera

Unpack and inspect the camera, ensuring all components are included. Attach the lens securely, insert the battery, and install memory cards. Set basic preferences like language and time zone for optimal functionality.

3.1 Unpacking and Initial Inspection

When unboxing the Nikon D3300, carefully inspect the camera body, lens, battery, charger, neck strap, and manual. Ensure all components are undamaged and accounted for. Verify the camera’s exterior for any visible defects before proceeding with setup.

3.2 Attaching the Lens

Align the lens mount with the camera’s F-mount, ensuring the white alignment marks match. Gently twist the lens clockwise until it clicks into place. Secure the lens firmly to ensure proper AF contacts connection. Handle the lens by its edges to avoid smudging the glass or damaging the mount.

3.3 Charging and Inserting the Battery

Charge the EN-EL14a battery using the supplied MH-24 charger until the indicator turns green; Align the battery’s terminals with the camera’s compartment and insert it securely until it clicks. Ensure the battery is fully seated to avoid power issues. Always use Nikon-approved chargers to prevent damage and maintain battery health.

3.4 Inserting Memory Cards

Insert a compatible SD, SDHC, or SDXC memory card into the camera’s card slot. Open the compartment on the right side, ensure the card is oriented correctly, and gently push it in until it clicks. The camera will recognize the card, allowing you to store and capture images efficiently.

3.5 Basic Camera Settings

Set the mode dial to Auto for point-and-shoot simplicity. Adjust ISO sensitivity (default 100-6400) based on lighting. Set white balance to match your environment (e.g., Auto, Daylight, or Tungsten). Choose autofocus modes like AF-A for versatile focusing. Use the INFO button to access quick settings for customization and optimal image capture.

Shooting Modes

The Nikon D3300 offers essential shooting modes for enhanced creativity and control. Auto Mode captures stunning images effortlessly, while Manual Mode (M) provides full control over aperture and shutter speed. Customize your photography experience with these versatile options for perfect shots.

4.1 Auto Mode

In Auto Mode, the Nikon D3300 automatically adjusts settings like exposure, autofocus, and ISO sensitivity, making it ideal for beginners. The camera detects the scene and optimizes settings for sharp, well-balanced images. Users can rely on this mode for hassle-free photography, ensuring great results without manual adjustments. Perfect for capturing life’s fleeting moments effortlessly.

4.2 Manual Mode (M)

Manual Mode (M) on the Nikon D3300 grants full control over aperture, shutter speed, and ISO sensitivity, allowing photographers to tailor settings to their creative vision. This mode is ideal for experienced users seeking precise control over image exposure, enabling artistic expression and technical accuracy in various lighting conditions and subjects.

4.3 Aperture Priority (A/Av)

Aperture Priority mode (A/Av) allows you to set the aperture, while the camera automatically adjusts the shutter speed. This mode is ideal for controlling depth of field, with higher f-stops for landscapes and lower f-stops for portraits. Adjust the aperture using the dial, and the camera ensures proper exposure, balancing creativity with convenience.

4.4 Shutter Priority (S/Tv)

Shutter Priority mode (S/Tv) lets you set the shutter speed, while the camera adjusts the aperture. This mode is perfect for capturing motion, such as freezing fast-moving subjects or creating motion blur. Use the dial to select speeds, ideal for sports, wildlife, or artistic effects, giving you control over time and movement in your photos.

4.5 Scene Modes

Scene Modes optimize camera settings for specific scenarios. Choose from options like Portrait, Landscape, Night Portrait, and more. Each mode adjusts aperture, shutter speed, and ISO for ideal results. Portrait mode softens backgrounds, while Landscape mode enhances depth; Use the mode dial to select, ensuring your photos capture the mood and details of the moment perfectly.

Custom Settings

Custom Settings allow photographers to tailor camera functions to their preferences. Adjust ISO sensitivity, white balance, and autofocus modes to enhance control and creativity in various shooting conditions.

5.1 ISO Sensitivity Settings

ISO sensitivity settings on the Nikon D3300 range from 100 to 12,800, enabling photography in diverse lighting conditions. Lower ISOs (100-400) are ideal for bright lighting, minimizing noise. Higher ISOs (6400-12,800) capture images in low light but may introduce grain. Auto ISO allows the camera to adjust sensitivity automatically based on lighting conditions for optimal results.

5.2 White Balance

White balance on the Nikon D3300 adjusts color tones to match lighting conditions. Options include Auto, Direct Sunlight, Incandescent, Fluorescent, Cloudy, and Shade. Custom White Balance allows setting a specific color temperature using a reference object. Adjustments can be fine-tuned in the camera menu for precise control over image color accuracy and visual appeal.

5.3 Autofocus Modes

The Nikon D3300 offers multiple autofocus modes to suit various shooting scenarios. Single AF (AF-S) focuses on stationary subjects, while Continuous AF (AF-C) tracks moving subjects. Manual Focus (MF) allows precise control. Users can switch modes via the camera menu or dedicated buttons, ensuring sharp images in diverse conditions, from portraits to dynamic action shots.

Using Flash and External Lighting

The Nikon D3300 features a built-in flash for low-light conditions and supports external flash units. Adjust flash settings via the camera menu for optimal lighting control and enhanced photography results.

6.1 Built-In Flash

The Nikon D3300’s built-in flash provides convenient lighting in low-light conditions. It automatically pops up and fires when enabled. Users can adjust flash settings like sync speed (1/320s or 1/250s) and mode (Auto FP) via the camera menu for balanced exposures and reduced shadows in various shooting scenarios.

6.2 External Flash Units

External flash units enhance lighting control and versatility for the Nikon D3300. Compatible with the Nikon Creative Lighting System, they offer advanced features like wireless operation and manual adjustments. Models like the SB-500 can be synced with the camera’s settings, providing professional-grade illumination for diverse shooting scenarios and creative effects.

Image Quality and Settings

The Nikon D3300 offers high-quality imaging with a 24.2-megapixel CMOS sensor, allowing for detailed photos. Users can adjust image resolution, choose between JPEG and RAW formats, and select color modes to customize output, ensuring optimal results for various photography needs.

7.1 Image Resolution

The Nikon D3300 captures images in multiple resolutions, including 6000 x 4000 pixels for maximum detail. Lower resolutions, such as 4496 x 3000 and 2992 x 2000, are ideal for sharing and storage. Adjust resolution via the Shooting Menu to balance quality and file size according to your needs.

7.2 Compression Formats (JPEG, RAW)

The Nikon D3300 supports JPEG for compressed, shareable images and RAW for uncompressed files with maximum detail. Choose JPEG for convenience or RAW for professional editing. Settings are adjustable via the Shooting Menu, allowing customization to suit your workflow and creative needs.

7;3 Color Modes

The Nikon D3300 offers multiple Color Modes to enhance your images. Options include Standard, Neutral, Vivid, Monochrome, Portrait, and Landscape. These modes adjust color saturation, contrast, and sharpness. Customize settings in the Shooting Menu to match your creative vision, ensuring images reflect your desired aesthetic with precision and clarity.

Playback and Review

The Nikon D3300 allows you to review images on its LCD screen. Use the playback button to view photos, zoom in for details, and delete unwanted images. The camera also features a slideshow option for viewing your photos in sequence, making it easy to share or review your work on the go.

8.1 Reviewing Photos

Press the playback button to review captured images on the LCD screen. Use the multi-selector to scroll through photos, zoom in for details, or skip to the next image. The camera also allows you to delete unwanted photos during playback, ensuring your memory card remains organized with only your best shots.

8.2 Deleting Images

Press the playback button to enter playback mode. Use the multi-selector to navigate to the image you wish to delete; Press the trash can button (labeled DELETE) to delete the image. Confirm deletion by selecting Yes in the dialog box. Note that deleted images cannot be recovered, so use this feature cautiously.

8.3 Slideshow

To create a slideshow, access the Playback Menu and select Slideshow. Choose images from the memory card or a specific folder. Adjust the interval between images (2-10 seconds) and select transition effects. Start the slideshow by pressing the OK button. Pause or exit using the menu button or turning the camera off.

Menu Navigation

Navigate the Nikon D3300 menu system using arrow keys and the OK button. Access Shooting, Setup, Retouch, and My Menu tabs. Customize settings efficiently for personalized control and optimal performance.

9.1 Shooting Menu

The Shooting Menu allows customization of image capture settings. Adjust ISO sensitivity, white balance, and autofocus modes. Set image quality, compression formats (JPEG, RAW), and color modes. Access advanced options like noise reduction and Active D-Lighting for enhanced control over your photography.

9.2 Setup Menu

The Setup Menu offers tools for camera configuration. Customize monitor brightness, adjust time zones, and set language preferences. Format memory cards, reset shooting settings, and enable firmware updates. Options like auto shutdown and battery monitoring help optimize performance and extend battery life for efficient photography sessions.

9.3 Retouch Menu

The Retouch Menu allows in-camera editing of photos. Options include trimming, resizing, and applying filters like monochrome or sepia tones. Red-eye correction and image overlay are also available. This feature enables quick enhancements without a computer, making it ideal for photographers who want to refine their images directly on the camera.

9.4 My Menu

My Menu allows you to customize a list of frequently used settings for quick access. You can add, reorder, and remove items based on your preferences. Commonly added options include ISO sensitivity, white balance, and autofocus modes. This feature streamlines your workflow, enabling faster adjustments during shoots and enhancing overall efficiency.

Troubleshooting Common Issues

Resolved issues like camera not turning on or memory card errors by checking settings, cleaning contacts, and ensuring proper battery installation. Consult the manual for detailed solutions.

10.1 Camera Not Turning On

If the Nikon D3300 won’t turn on, ensure the battery is fully charged and properly inserted. Check for damaged battery terminals or corrosion. Verify the memory card is correctly inserted and not causing power issues. Consult the manual for additional troubleshooting steps to resolve the problem effectively.

10.2 Memory Card Errors

If the Nikon D3300 displays memory card errors, ensure the card is compatible and properly formatted. Try cleaning the card’s contacts or reformatting it in the camera. If issues persist, replace the card. Always back up data before formatting. Consult the manual for detailed troubleshooting steps to resolve memory card-related problems effectively.

Accessories and Compatibility

The Nikon D3300 is compatible with a wide range of accessories, including Nikon F-mount lenses, external flash units, and tripods, ensuring enhanced functionality and versatility for photographers.

11.1 Compatible Lenses

The Nikon D3300 supports a variety of Nikon F-mount lenses, including AF-S DX and AF-S FX lenses. Popular options include the AF-S DX 18-55mm VR II and AF-S DX 35mm f/1.8G. These lenses enhance image quality and provide flexibility for different shooting scenarios, from portraits to landscapes.

11.2 External Flash Units

The Nikon D3300 supports external flash units like the SB-300, SB-400, SB-600, and SB-700, enhancing lighting control and versatility. These units can be mounted on the camera’s hot shoe or used wirelessly for creative lighting setups. Set the flash sync speed to 1/320s or 1/250s for optimal results. The Nikon Manual Viewer app provides detailed guidance.

11.3 Tripods and Remote Shutter Release

For stability, the Nikon D3300 can be mounted on a tripod using its standard tripod socket. Remote shutter release options, like the ML-L3 remote or third-party devices, minimize camera shake. Enable remote shutter mode via the Shooting Menu. The Nikon Manual Viewer app provides detailed instructions for setup and optimal use of these accessories.

The Nikon D3300 is a powerful yet user-friendly DSLR camera, ideal for capturing life’s precious moments. By mastering its features and settings, photographers can unlock its full potential. This guide has provided a comprehensive overview of the camera’s operation, ensuring users can confidently navigate and utilize its capabilities for exceptional photography experiences.

Additional Resources

For further learning, download the Nikon Manual Viewer 2 app or access the official Nikon website for detailed guides, firmware updates, and troubleshooting tips. Additionally, online forums and photography communities offer valuable insights and support for mastering the Nikon D3300;

chamberlain liftmaster professional formula 1 instruction manual

Overview of the Chamberlain LiftMaster Professional Formula 1 Instruction Manual

The Chamberlain LiftMaster Professional Formula 1 manual provides comprehensive guidance for models 1280, 1280r, 2280, and 3280, ensuring reliable and user-friendly installation, operation, and maintenance. Available in PDF format for easy access.

The Chamberlain LiftMaster Professional Formula 1 series is a line of garage door openers known for their reliability, durability, and user-friendly design. Designed with advanced technology, these models, including the 1280, 1280r, 2280, and 3280, offer smooth and quiet operation. The series is engineered to meet various garage door needs, featuring a powerful 1/2 HP motor and a reinforced belt drive system. With a focus on safety and convenience, the Formula 1 series includes features like the Motor Vibration Isolation System (MVIS) and compatibility with Chamberlain’s myQ smart home technology. These openers are designed to provide years of trouble-free service, making them a popular choice for homeowners seeking high-quality garage door solutions.

Key Features of the Chamberlain LiftMaster Professional Formula 1 Models

The Chamberlain LiftMaster Professional Formula 1 models are equipped with a powerful 1/2 HP motor, ensuring smooth and efficient operation. The belt drive system minimizes noise, while the Motor Vibration Isolation System (MVIS) further enhances quiet performance. These models feature a reinforced drive belt for durability and long-lasting reliability. Security Plus technology offers rolling code encryption for enhanced protection against unauthorized access. The openers are compatible with a range of accessories, including remotes, keyless entry systems, and smart home integration via myQ technology. With features like courtesy lights and intuitive programming, the Formula 1 series provides a seamless user experience, making it a top choice for homeowners seeking dependable and advanced garage door solutions.

Installation and Setup Guidelines

The manual provides detailed installation steps, emphasizing safety precautions, balanced door requirements, and proper tool usage. Professional installation is recommended for optimal performance and reliability.

Step-by-Step Installation Instructions for the Chamberlain LiftMaster Professional Formula 1

The manual outlines a detailed, step-by-step guide for installing the Chamberlain LiftMaster Professional Formula 1 series. It begins with gathering necessary tools and ensuring the garage door is properly balanced. The instructions then walk through assembling components, securing the opener to the ceiling, and aligning the rail system. Users are guided to attach the door arm and test the opener’s limits for smooth operation. Safety precautions are emphasized throughout, including avoiding DIY installation if unsure. The manual also provides troubleshooting tips for common issues and recommends professional assistance for complex setups to ensure reliability and performance.

Safety Precautions and Warnings During Installation

Always read and follow all safety materials and installation instructions carefully. Ensure the garage door is properly balanced and lubricated before installation, as an unbalanced door can cause damage or injury. Avoid installing the opener yourself if unsure, as improper installation may lead to hazards. Keep children and pets away from the installation area. Never attempt to operate the door during installation without ensuring all components are securely fastened. Test the opener’s limits after installation to ensure smooth operation. Fasten the manual near the garage door for future reference. Failure to adhere to these precautions may void the warranty or result in safety risks. Always prioritize caution and consider professional installation for complex setups.

Troubleshooting and Maintenance

Troubleshoot common issues like misalignment or sensor problems. Reset the opener if necessary. Regularly lubricate moving parts and check belt tension for optimal performance. Ensure safety always.

Common Issues and Solutions for the Chamberlain LiftMaster Professional Formula 1

The Chamberlain LiftMaster Professional Formula 1 series is reliable, but some common issues may arise. Misaligned sensors can prevent the door from closing properly; simply adjust the sensors for proper alignment. Remote controls may stop working due to dead batteries or interference; replace batteries or reprogram the remote. The belt drive system, while durable, may squeak if improperly lubricated; apply silicone-based lubricant to moving parts. If the door reverses unexpectedly, check for obstructions or adjust the force settings. For persistent issues, consult the manual or contact customer support. Regular maintenance, such as lubricating hinges and tightening bolts, ensures smooth operation. Always follow safety guidelines during troubleshooting.

Programming Remotes and Keyless Entry Systems

Programming remotes and keyless entry systems for the Chamberlain LiftMaster Professional Formula 1 is straightforward. Start by locating the “learn” button on the motor unit, typically orange in color. Press and release the button to enter programming mode. Next, press the desired button on your remote control to sync it with the opener. For keyless entry systems, enter your chosen code on the keypad and press the “enter” button. Ensure compatibility with models like 971LM, 973LM, and 977LM. If issues arise, reprogramming or resetting the system may be necessary. Always refer to the manual for specific instructions tailored to your model. Proper programming ensures secure and convenient garage door operation.

Technical Specifications and Compatibility

The Chamberlain LiftMaster Professional Formula 1 models (1280, 1280r, 2280, 3280) feature a 1/2 HP motor, belt drive, and Security Plus technology. Compatible with 971LM, 973LM, and 977LM remotes.

Model Differences: 1280, 1280r, 2280, and 3280

The Chamberlain LiftMaster Professional Formula 1 series includes four distinct models, each designed for specific needs. The 1280 and 1280r models feature a 1/2 HP motor, belt drive system, and Security Plus technology for enhanced security. The 1280r additionally includes a keyless entry system for convenience. The 2280 model offers a 3/4 HP motor, making it suitable for heavier garage doors, while the 3280 combines a 3/4 HP motor with an advanced belt drive for quieter operation. All models are compatible with Chamberlain and LiftMaster accessories, such as remotes and keyless entry systems, ensuring versatility and ease of use. These differences allow users to choose the model that best fits their garage door requirements and preferences.

Compatibility with Chamberlain and LiftMaster Accessories

The Chamberlain LiftMaster Professional Formula 1 models are designed to work seamlessly with a range of Chamberlain and LiftMaster accessories. These include remote controls such as the 971LM, 973LM, and 970LM, as well as keyless entry systems like the 977LM. Compatibility ensures that users can enhance their garage door opener’s functionality with additional features like remote access and secure keyless entry. However, it’s important to note that some older remote and keyless entry models have been discontinued, so compatibility should be verified before purchasing. This wide range of accessory options allows for a customized and convenient garage door operating experience tailored to individual needs and preferences.

Enhanced Features and Benefits

The Chamberlain LiftMaster Professional Formula 1 series features advanced technologies like the Motor Vibration Isolation System (MVIS) and belt drive for quieter, smoother operation, enhancing overall performance and reliability.

Motor Vibration Isolation System (MVIS) for Quieter Operation

The Motor Vibration Isolation System (MVIS) is a cutting-edge feature in the Chamberlain LiftMaster Professional Formula 1 series, designed to minimize noise during operation. By absorbing motor vibrations, MVIS ensures a quieter and smoother performance, making it ideal for homes where noise reduction is a priority. This innovative system is integrated into the motor assembly, effectively isolating vibrations from the rest of the garage door opener. The result is a significant reduction in operational noise, creating a more peaceful environment. MVIS also contributes to the overall durability and reliability of the system, ensuring long-lasting performance. This feature is a testament to LiftMaster’s commitment to delivering high-quality, user-friendly solutions for garage door automation.

Belt Drive System for Smooth and Reliable Performance

The Chamberlain LiftMaster Professional Formula 1 series features a robust belt drive system designed for smooth and reliable operation. This system utilizes a reinforced belt to minimize wear and tear, ensuring consistent performance over time. Unlike chain-driven systems, the belt drive operates with significantly less noise, making it ideal for homes where quiet operation is essential. The belt drive also reduces vibrations, contributing to a more stable and durable garage door opener. With its advanced engineering, the belt drive system requires minimal maintenance while delivering exceptional reliability. This feature underscores the series’ commitment to providing a seamless and trouble-free user experience, aligning with the overall quality and innovation expected from Chamberlain and LiftMaster products.

Downloading and Accessing the Manual

The Chamberlain LiftMaster Professional Formula 1 manual is readily available in PDF format for easy download from the official Chamberlain website and other trusted sources online.

Availability of the Chamberlain LiftMaster Professional Formula 1 Manual in PDF Format

The Chamberlain LiftMaster Professional Formula 1 manual is widely available in PDF format, ensuring easy access for users. It can be downloaded directly from the official Chamberlain website or through trusted online sources. The PDF format allows for convenient viewing on computers, tablets, and smartphones, making it a versatile option for users. Additionally, the manual is searchable and can be printed for offline reference. This accessibility ensures that users can quickly find the information they need for installation, troubleshooting, or maintenance. The PDF manual is free to download and does not require registration, making it a hassle-free resource for all Chamberlain LiftMaster Formula 1 users.

Safety Guidelines and Best Practices

Always follow the safety guidelines in the manual to ensure proper installation and operation. Keep the garage door balanced and lubricated to prevent accidents and maintain functionality.

Important Safety Information for Garage Door Opener Installation and Use

Always read and follow the safety guidelines in the manual before installing or operating the garage door opener. Ensure the door is properly balanced and lubricated to prevent accidents. Never allow children to operate the door or remote controls unsupervised. Keep emergency release handles accessible and test the door’s reversal mechanism regularly. Avoid installing the opener on uneven or unstable surfaces. If unsure about any step, consult a professional installer. Improper installation can lead to serious injury or equipment damage. Regularly inspect and maintain the opener to ensure smooth operation. Failure to adhere to these precautions may result in unsafe conditions. Refer to the manual for detailed troubleshooting and maintenance instructions.

Warranty and Support Information

The Chamberlain LiftMaster Professional Formula 1 models come with a limited warranty for parts and labor. Registration is required for warranty activation. Contact customer support for assistance or repair.

Chamberlain LiftMaster Warranty Details and Customer Support Options

The Chamberlain LiftMaster Professional Formula 1 series offers a limited warranty covering parts and labor for a specified period. Registration is required to activate the warranty. Customers can access support through phone, email, or the official website. Online resources, including FAQs and downloadable manuals, are available for troubleshooting. Additional support options include live chat and a network of authorized dealers. The warranty does not cover damage caused by improper installation or misuse. For extended assistance, users can contact Chamberlain LiftMaster customer service directly or visit authorized service centers. This ensures comprehensive support for installation, maintenance, and repairs.

Professional Installation Recommendations

Professional installation is highly recommended for the Chamberlain LiftMaster Professional Formula 1 series to ensure optimal performance and safety. Certified technicians can properly balance and align the garage door opener, reducing the risk of malfunctions. They will also verify that all safety features, such as the auto-reverse mechanism, are functioning correctly. Additionally, professionals can handle complex wiring and programming, ensuring seamless integration with accessories like remotes and keyless entry systems. For models with advanced features like the Motor Vibration Isolation System (MVIS) and belt drive, precise installation is crucial for quiet and smooth operation. Users can contact Chamberlain LiftMaster customer support to find authorized installers in their area, guaranteeing a reliable and warranty-compliant setup.

plumbing flat rate pricing pdf

Plumbing flat rate pricing offers transparency‚ with predetermined fees for specific services‚ ensuring no surprises․ Based on industry averages and time/material costs‚ it provides upfront clarity‚ benefiting both customers and businesses․

Definition and Overview

Flat rate pricing in plumbing involves charging customers a fixed‚ predetermined fee for specific services‚ regardless of the time taken․ This model provides upfront cost clarity‚ eliminating surprises․ Based on industry averages‚ it covers labor‚ materials‚ and overheads for tasks like repairs or installations․ Unlike hourly rates‚ it offers a straightforward payment structure‚ fostering trust and simplicity for both homeowners and plumbing professionals․

History and Evolution in the Plumbing Industry

Flat rate pricing emerged as a response to customer demand for transparency and predictable costs․ Historically‚ plumbing services used hourly rates‚ which often led to billing disputes․ The shift to flat rates began in the early 2000s‚ with companies adopting predefined pricing based on industry standards․ This model gained popularity due to its simplicity and trust-building potential‚ becoming a standard practice supported by specialized software like ServiceTitan․

How Flat Rate Pricing Works in Plumbing

Flat rate pricing charges customers a fixed fee based on time and materials‚ with costs predetermined by industry standards․ ServiceTitan and similar tools help businesses create and manage these price books efficiently․

Upfront Cost Transparency for Customers

Flat rate pricing provides customers with clear‚ upfront costs for plumbing services‚ eliminating surprise charges․ This transparency builds trust and ensures customers understand the total fees before work begins‚ reducing billing anxiety․ ServiceTitan and similar tools help create detailed price books‚ making it easier for customers to review and approve quotes․ This approach streamlines communication and fosters satisfaction․

Time and Material Basis for Pricing

Flat rate pricing calculates costs based on the average time and materials required for specific tasks․ This method ensures consistency‚ as it reflects industry standards․ By standardizing labor times and material costs‚ plumbers can offer predictable pricing․ Customers benefit from knowing the exact breakdown of charges‚ fostering trust and clarity in the billing process․

Pros and Cons of Flat Rate Pricing

Flat rate pricing offers transparency and upfront costs‚ reducing customer uncertainty․ It simplifies billing but may not suit all businesses or complex jobs․

Advantages for Plumbing Businesses

Flat rate pricing enhances customer trust and satisfaction through upfront transparency․ It streamlines estimates‚ reduces disputes‚ and ensures consistent revenue․ Businesses benefit from predictable income and simplified financial planning․ Additionally‚ flat rate pricing allows companies to showcase professionalism and organization‚ setting them apart from competitors․ Tools like ServiceTitan further support efficient price book management‚ enabling businesses to thrive in a competitive market․

Drawbacks and Challenges

Flat rate pricing requires accurate job assessments to avoid undercharging or overcharging․ Misestimating labor or materials can lead to financial losses․ Additionally‚ complex jobs may exceed standard time frames‚ causing customer dissatisfaction․ Regular price book updates are essential to reflect market changes‚ adding administrative work․ Balancing customer expectations with profitability remains a key challenge for plumbing businesses using flat rate pricing systems․

Common Plumbing Services Offered with Flat Rate Pricing

Flat rate pricing covers repairs‚ installations‚ and maintenance for fixtures‚ water heaters‚ pipes‚ and appliances․ Emergency services are also included‚ ensuring predictable costs for essential plumbing needs․

Examples of Repairs and Installations

  • Faucet and toilet repairs‚ including replacement of worn-out parts․
  • Water heater installations and maintenance services․
  • Pipe leak repairs and complete system overhauls․
  • Garbage disposal installations and drain cleaning․
  • Emergency services for burst pipes and sewer backups․

These services are typically included in flat rate pricing‚ ensuring customers know the exact cost upfront․

Emergency and Overtime Services

Flat rate pricing for emergency and overtime services ensures upfront costs‚ eliminating surprise charges․ Common fees include $170 for limited access and high-rise shutdowns․ These charges are added to standard repair costs‚ providing transparency during urgent situations․ Customers appreciate knowing the total fee beforehand‚ even for after-hours or complex scenarios․

Flat Rate Pricing Software and Tools

Flat rate pricing software‚ like ServiceTitan‚ helps contractors create and manage custom price books․ These tools enable easy updates and ensure pricing transparency for customers‚ improving trust․

ServiceTitan and Other Platforms

ServiceTitan is a leading software for flat rate pricing‚ allowing contractors to upload existing price books or create new ones․ It simplifies pricing management‚ ensuring transparency for customers․ Other platforms offer similar tools‚ enabling contractors to streamline their pricing processes and maintain consistency․ These solutions are user-friendly‚ accessible via the internet‚ and designed to help plumbing businesses thrive efficiently while maintaining customer trust and satisfaction․

Creating a Custom Price Book

Creating a custom price book involves listing fixed fees for specific plumbing services‚ parts‚ and labor․ Based on industry averages‚ it ensures consistency and transparency․ Templates‚ like Google Sheets‚ simplify the process‚ allowing businesses to tailor prices to their operations․ This approach helps in setting clear expectations for customers while maintaining profitability for the company‚ ensuring satisfaction and trust in the services provided․

How to Create a Plumbing Flat Rate Price Book

Use industry standards and time/material calculations to set fixed fees․ Include labor‚ parts‚ and overhead․ Utilize tools like ServiceTitan or Google Sheets templates for accuracy and ease․

Industry Averages and Research

Research industry standards and regional pricing trends to establish fair rates․ Analyze labor costs‚ material markups‚ and average repair times․ Utilize resources like ServiceTitan or plumbing associations for accurate data․ Incorporate feedback from competitors and customer expectations to refine pricing․ Ensure your flat rate reflects the market while covering overhead and profit margins․ Regular updates keep pricing competitive and aligned with industry benchmarks․

Template and Software Solutions

Utilize plumbing flat rate pricing templates and software like ServiceTitan to streamline pricing management․ These tools allow creating custom price books‚ ensuring consistency and accuracy․ Google Sheets templates offer flexibility for small businesses‚ while dedicated software provides advanced features for large operations․ These solutions help contractors efficiently manage pricing‚ ensuring transparency and profitability․

Flat Rate Pricing vs․ Hourly Rate Pricing

Flat rate pricing offers fixed‚ upfront costs based on industry averages‚ while hourly rates vary with time spent․ Flat rates typically provide better customer clarity and budgeting․

Comparison of Models

Flat rate pricing charges a fixed fee per job‚ while hourly rates bill based on time spent․ Flat rate offers upfront cost clarity‚ reducing customer anxiety about escalating costs․ Hourly rates may lead to higher bills for complex tasks‚ but can be fair for unpredictable jobs․ Flat rate is often preferred for standard repairs‚ while hourly suits longer‚ uncertain projects․

Which is Better for Customers?

Flat rate pricing is typically better for customers as it provides upfront‚ predictable costs with no hidden fees․ This transparency builds trust and avoids bill shocks․ Hourly rates can lead to higher charges‚ especially for complex tasks‚ making flat rate more customer-friendly for standard plumbing services․

Common Fees and Charges in Flat Rate Pricing

Flat rate pricing includes fixed fees for specific tasks‚ with additional charges for materials‚ labor‚ and special circumstances like limited access or high-rise services․

Limited Access and High-Rise Fees

Flat rate pricing often includes additional fees for limited access or high-rise jobs․ These fees‚ typically around $170‚ cover the extra time‚ specialized equipment‚ and logistical challenges involved in such locations․ They ensure fair compensation for the complexity and additional resources required in these specific scenarios‚ maintaining transparency and fairness in the billing process․

Material Markups and Labor Costs

Flat rate pricing includes markups on materials and labor‚ typically adding 50% to material costs and charging labor based on industry averages․ This ensures contractors cover expenses and profit margins․ The fixed fee combines these elements‚ providing clarity and preventing billing disputes‚ while allowing businesses to maintain profitability across various service scenarios and customer demands effectively․

Best Practices for Implementing Flat Rate Pricing

Implement flat rate pricing using software like ServiceTitan for accuracy․ Ensure clear communication of costs to build customer trust and regularly update your price book to reflect market changes․

Customer Communication and Trust

Clear communication is key to building trust with customers․ Explain the flat rate pricing structure upfront‚ ensuring transparency about costs and services․ Provide detailed estimates and involve customers in decision-making to avoid misunderstandings․ Honest and upfront pricing fosters loyalty‚ as customers appreciate knowing exactly what they’re paying for without hidden fees․ Regular updates and clear explanations reinforce trust in your plumbing services․

Regular Updates and Adjustments

Regular updates to your flat rate pricing ensure accuracy and relevance․ Stay informed about industry changes‚ material costs‚ and labor rates to adjust prices accordingly․ Use software tools like ServiceTitan to streamline updates and maintain consistency․ Clear communication of any changes to customers and technicians is essential for transparency․ Regular adjustments help balance profitability while keeping pricing fair and competitive in the market․